In this article I will explain how you can embed video call on your website.
Video call is the best tool to increase engagement, provide customer support, give sales demo and conduct meetings on your website.
In this article I am going to explain the steps involved in embedding a video call to your website plus bonus
Step 1: Choosing a Video Call Provider
The process of embedding video chat to your website starts with choosing a video call provider.
Some of the important considerations for video call provider are
- Customization (to match your website and look like a part of your website)
- Moderation (ability to moderate calls, ban users, take control of camera, mic etc)
- Admin features (fine tune the application according to your needs)
- Recording (ability to record the videos separately as well as in a composed format)
- Screen Sharing
- Chat
With regards to choosing a video call provider we recommend going with Metered Video Embed. It has all the above features and many more that you can try out for free by creating an account on the website of Metered Video Embed
Step 2: Creating an account
To create an account with Metered video go to its website and click on the Sign Up button.
Fill up a simple sign up for and create a free account.
With every account you get a $30 USD credit that you can use to explore the Embed and all its functionalities.
Basic video call and screen sharing starts at $0.003 USD per participant per minutes and there are other pay per use pricing for other functionalities like recording, composition, live streaming and others.
You can learn more about pricing on the pricing page
Step 3: Create a Meeting Room
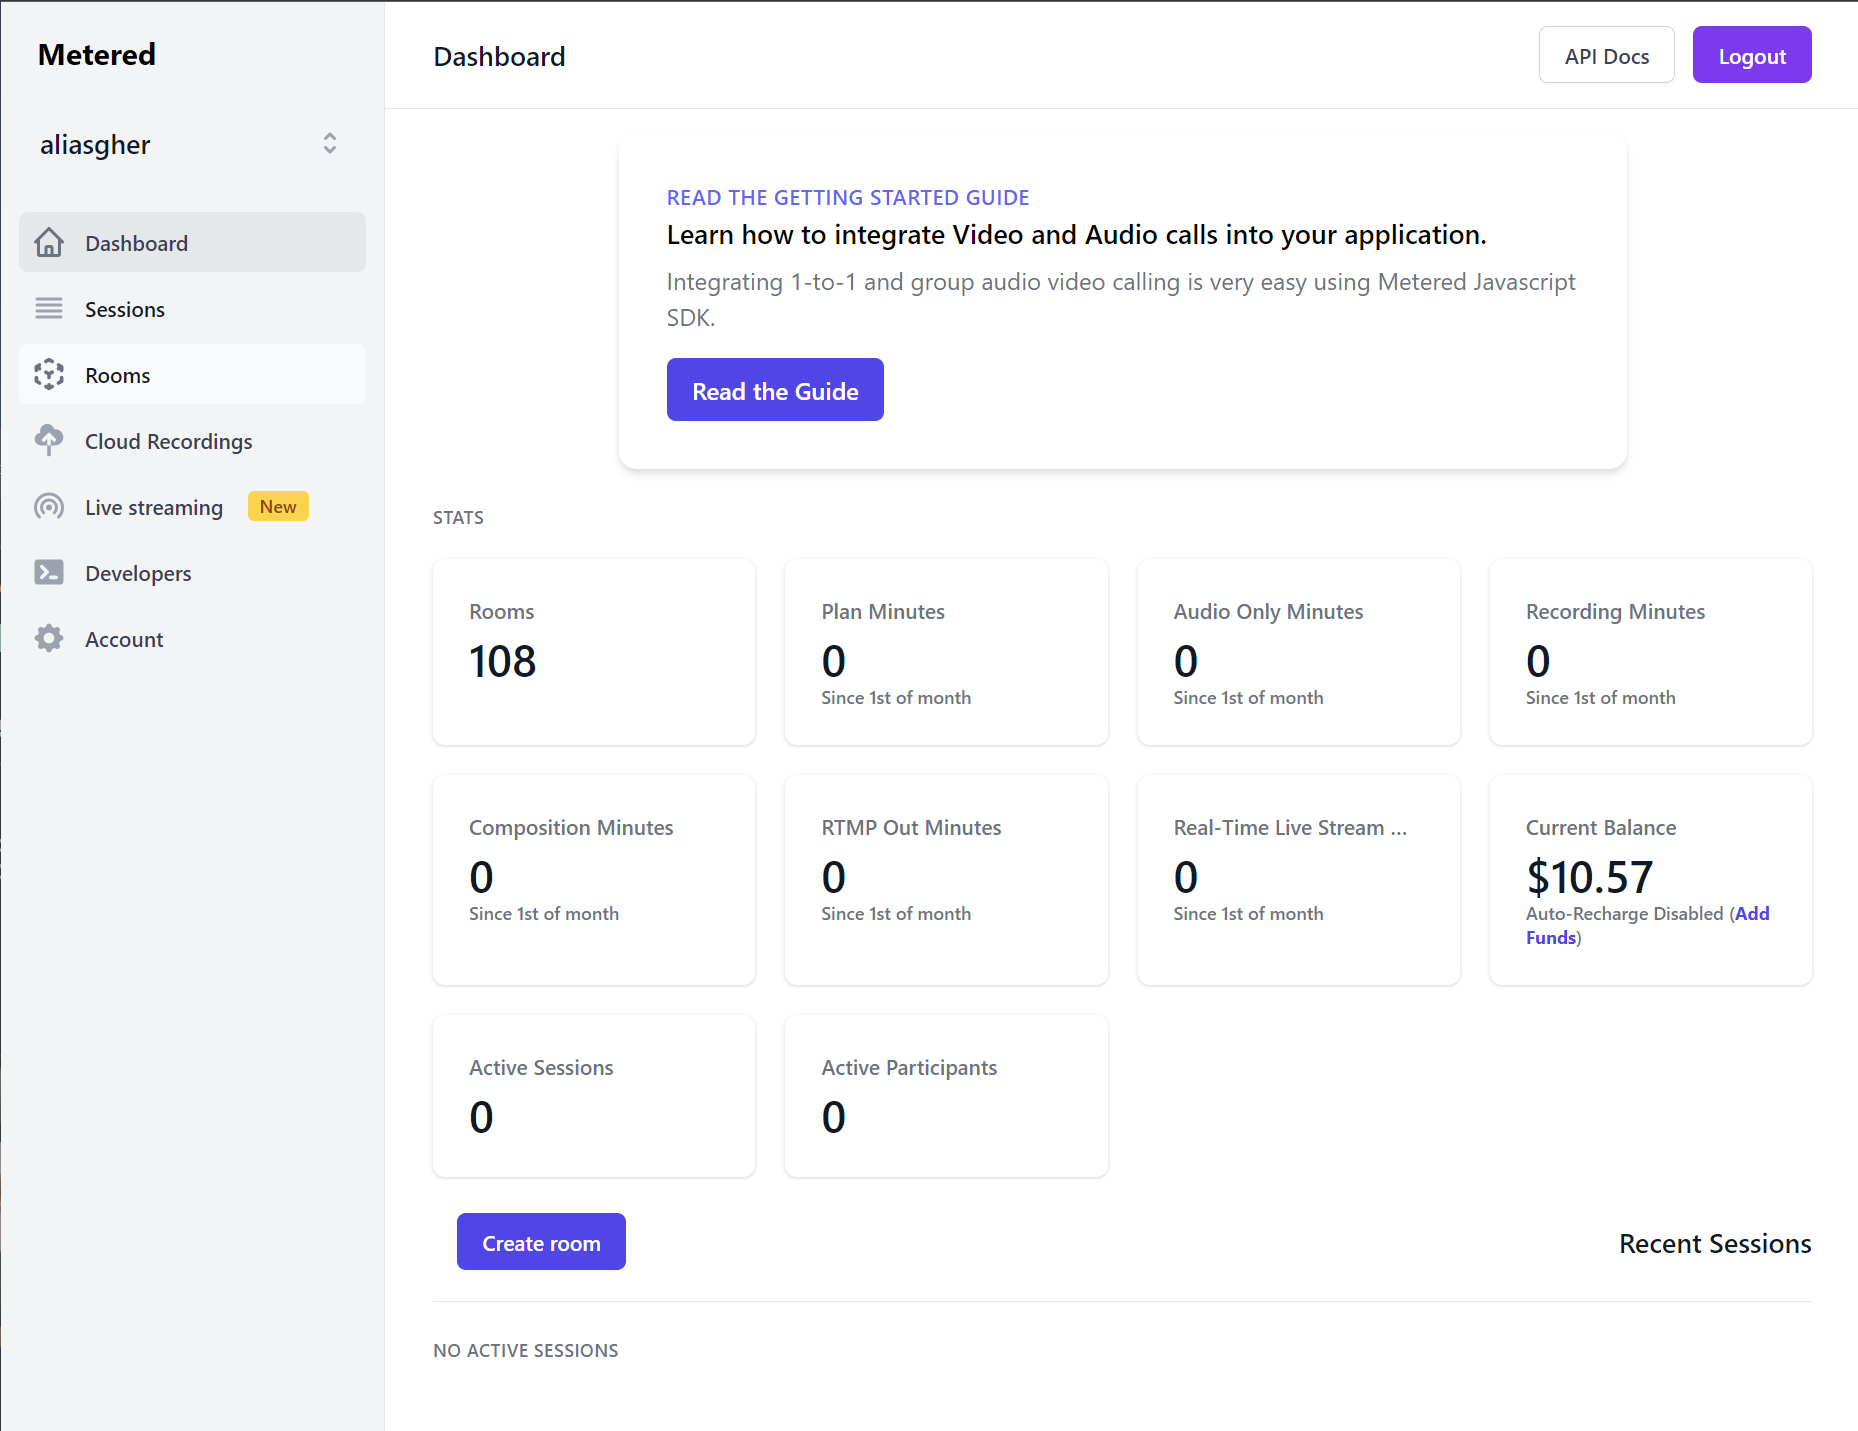
When you have successfully created an account then you will land up in the dashboard page.
There click on the "create room" button to create a room.
When creating a room there are a lot of settings that you can do.
Here are some of the features and settings that you can do to have a custom video call experience on your website
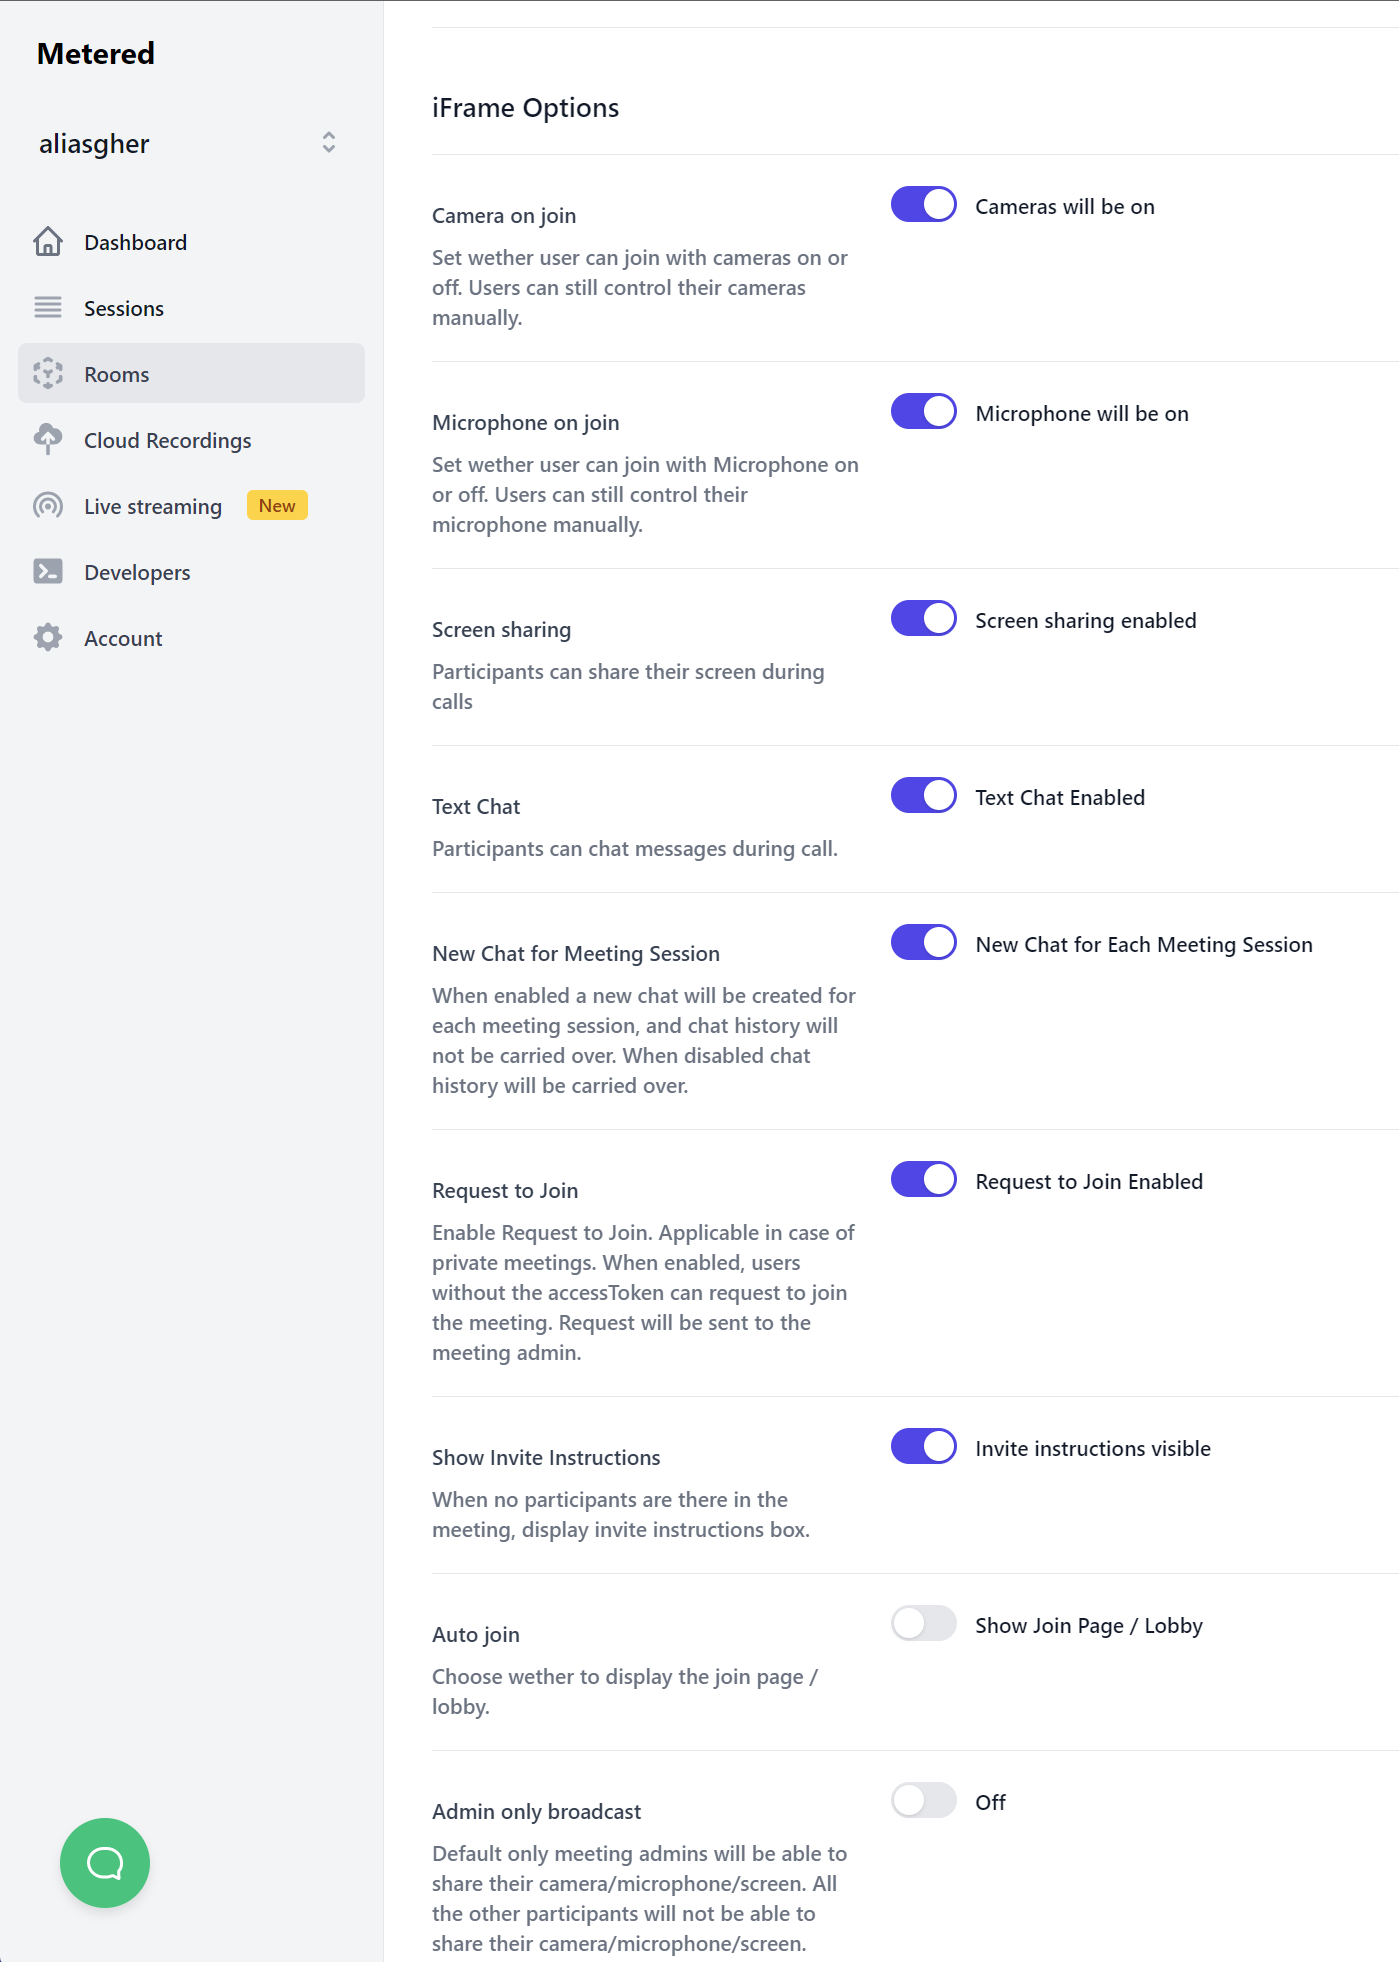
- Camera on Join: Users will join with their camera on/off
- Microphone on Join: Users will join with their Microphone on/off
- Screen Sharing: Participants can share their screen during calls
- Text Chat: Participants can chat messages during call.
- New Chat for Meeting Session: a new chat will be created for each meeting session.
- Request to Join: New participants will knock before joining and admin has to allow them to enter
- Show Invite Instructions: Show invite instructions to participants, so that they can invite other participants in the video call
- Auto Join: Automatically join participants in the video call embed
- Admin Only Broadcast: Only Admin can broadcast the Video call to all participant other participants cannot share video and audio
These are some of the admin options available there are some features as well:
- Adding a custom room name
- Setting the Room as a Private or Public room. In Public rooms anyone can enter, but in Private rooms only people invited can enter.
- Create an audio only room. If you need an audio only room then you can create that as well
- Record Room: You can record individual streams for video and audio for each user.
- Composed Recording: Create a composed video recording with a single stream of Video and audio for all users.
- Add Watermark: You can add watermark to your Video call and customize the size and position of the watermark to your liking.
There are some advanced settings available as well to customize the video call as
- Maximum Participants: You can set the maximum number of participants that can attend the video call.
- Meeting Join Webhook: You can set an endpoint where when someone joins a meeting a webhook will be triggered.
- Meeting Left Webhook: You can set an endpoint where when someone leaves a meeting a webhook will be triggered.
- Meeting Started Webhook: Webhook will be triggered when the meeting is started.
- endMeetingAfterNoActivityInSec: The meeting will end after no activity during a time frame specified by you in seconds.
- Eject After: Eject participants from the meeting after some time as specified by you in seconds.
Step 4: Copy Video Call Code.
After you have created the room the next page you will get you is the Room Summary and Embed Info Page
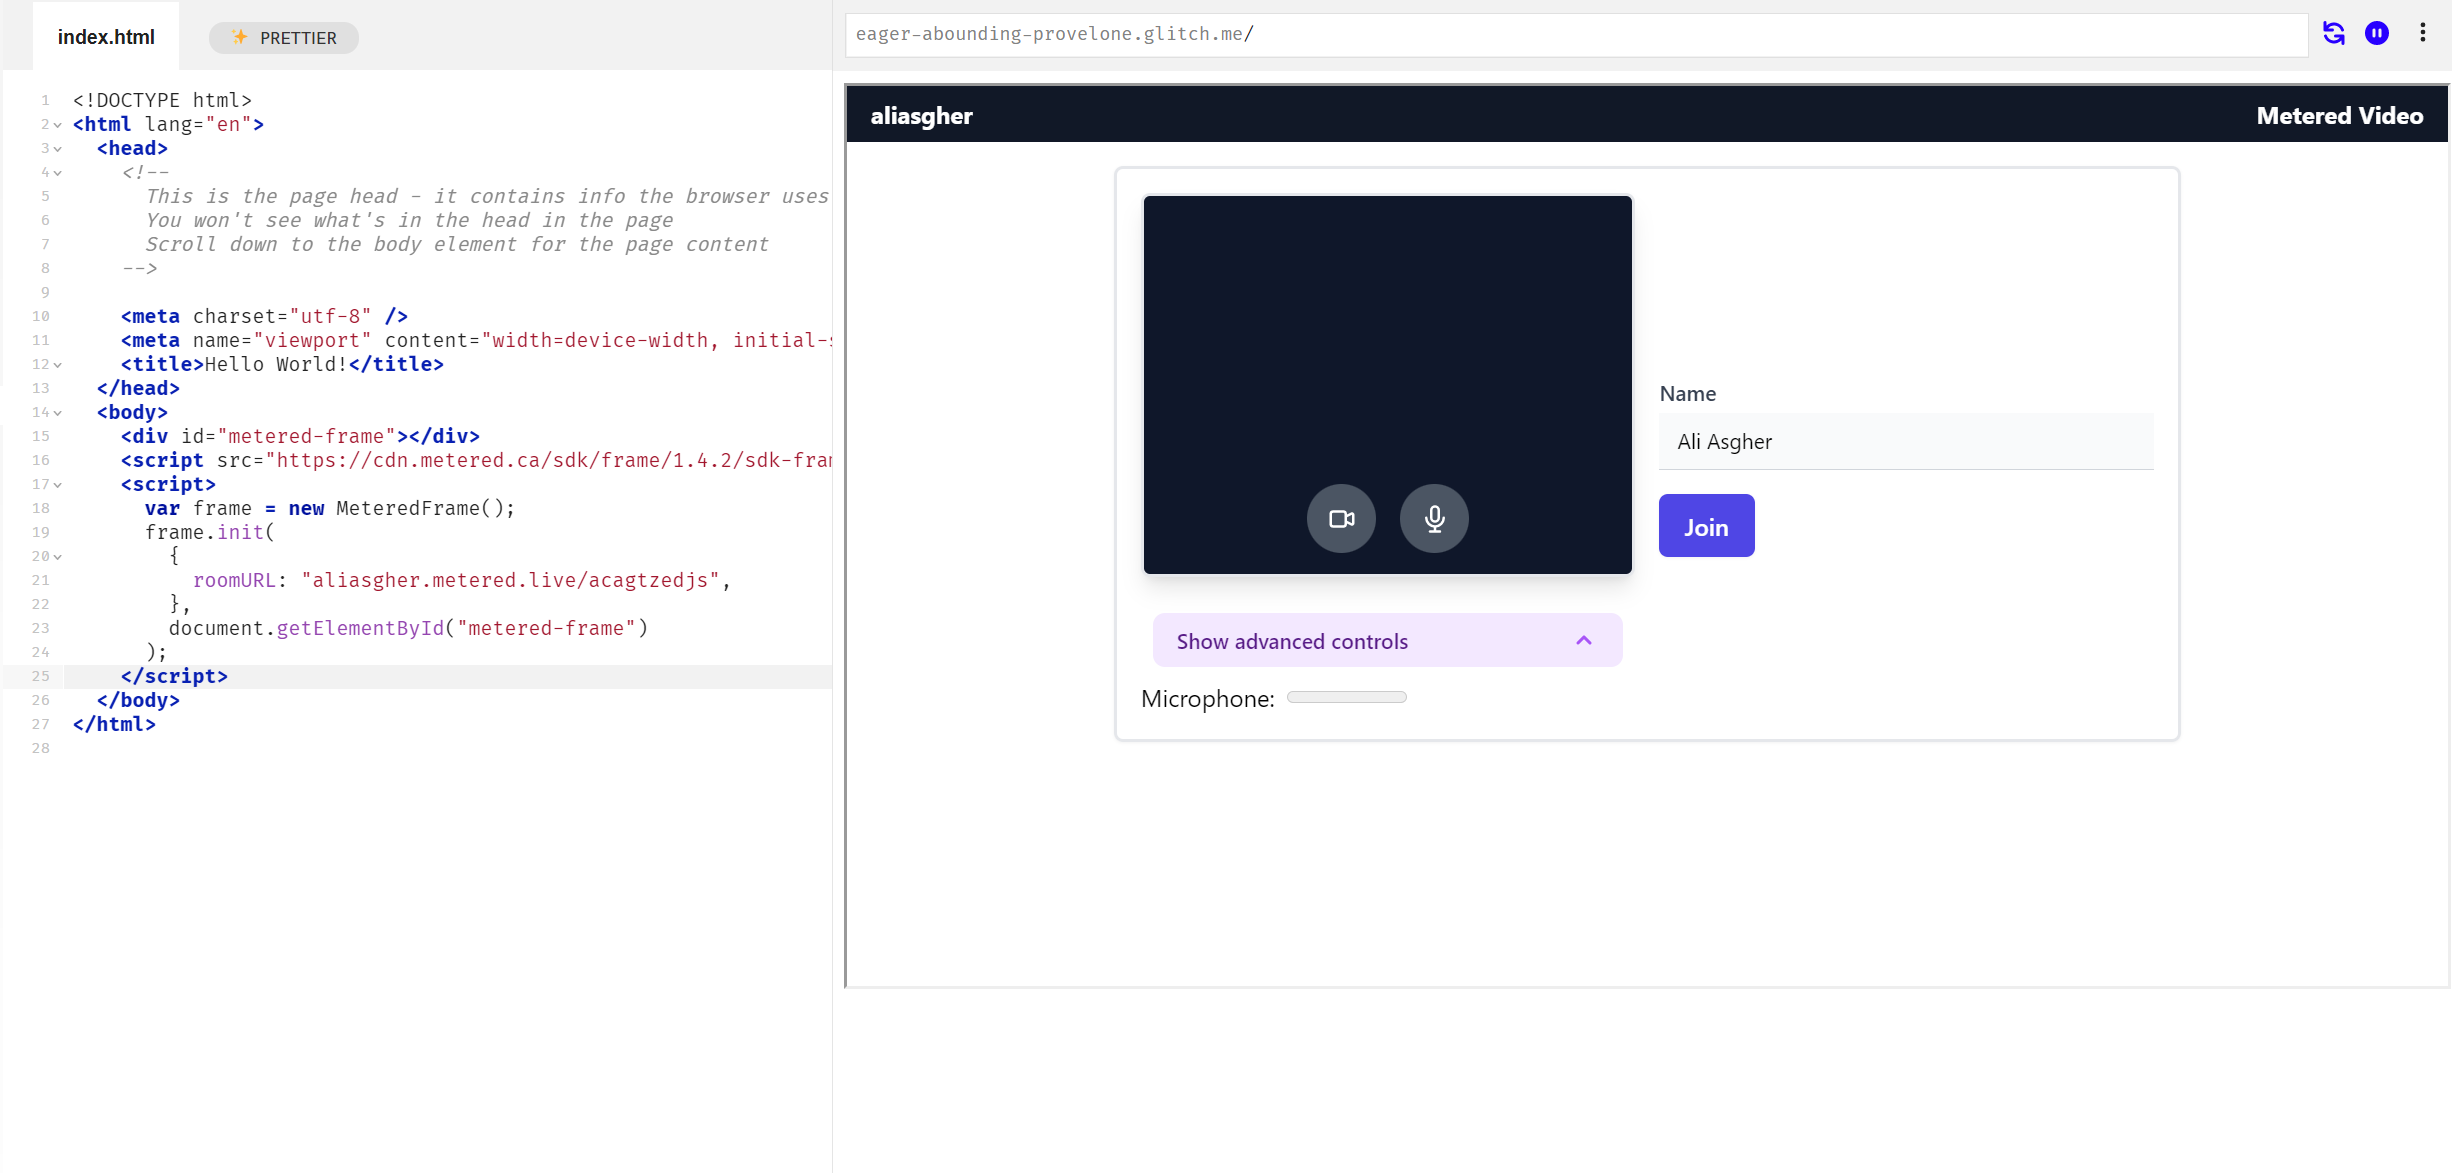
There you will find the embed information like this:
<div id="metered-frame"></div>
<script src="https://cdn.metered.ca/sdk/frame/1.4.2/sdk-frame.min.js"></script>
<script>
    var frame = new MeteredFrame();
    frame.init({
        roomURL: "aliasgher.metered.live/acagtzedjs",
    }, document.getElementById("metered-frame"));
</script>
To embed video call to your website, copy the code from the Embed info page.
Step 5: Paste the Video Call Code
Paste the code that you have copied in the previous website on your HTML where you want to embed the video call
After embedding the video call you can adjust the size and shape of the embed by adjusting the div with the id metered-frame
That's it now you have successfully embedded the video call on your website.
Enable Cloud Recording
You can enable Cloud recording when you are creating the room. Enable the Cloud recording button in the settings when creating the room
If you have not done so you can do it by going to Dashboard -> Rooms (on the left hand side bar) ->Rooms. Here you will see a list of rooms that you have created click on the edit button on the room which you want to enable recording.
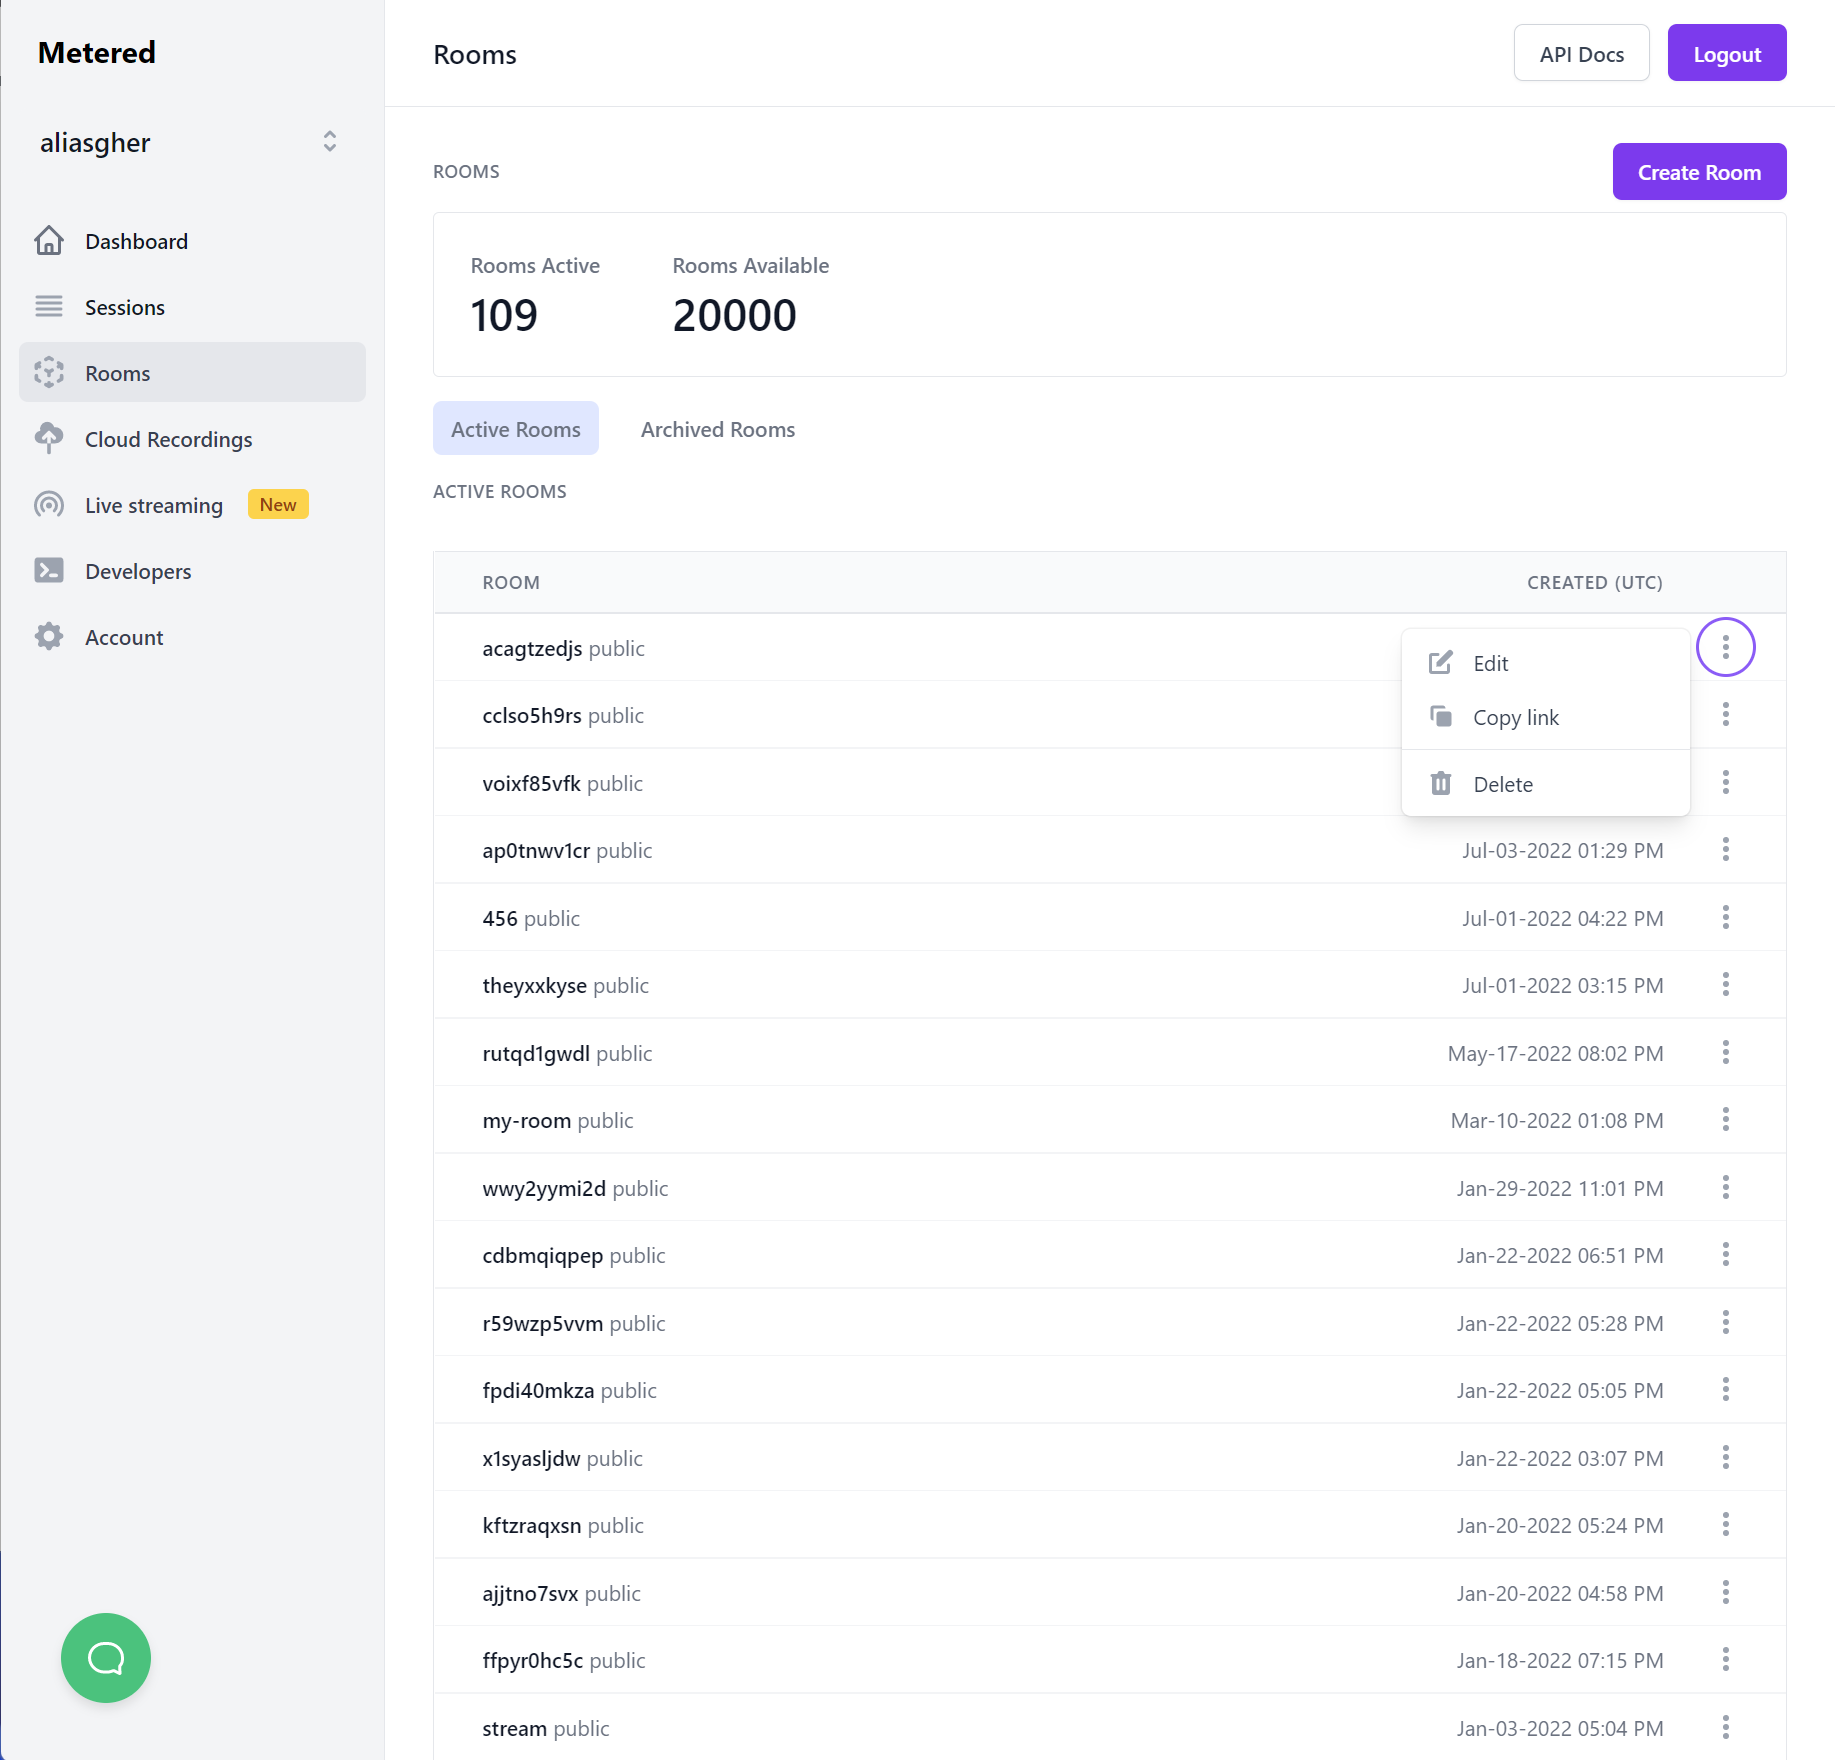
This will lead you to the edit room page you can enable the recording here.
There are 2 options for recording.
- Record individual streams and
- Composed recording ( A single stream with recordings of all the participants)
Accessing Admin features
There are many features available in the embed SDK which could be useful when accessing the Video Call embed on your website.
We have divided these features into
- Methods (Gives you the ability to do something)
- Events (Gives you information about something)
Here are some of the Methods and Events which might be useful.
- init: The init method initializes the iframe , you can pass it some of the options like width of the embed and height of the embed to adjust the video call height and width.
There are also features like naming the iframe, Auto Join participants among others. You can learn more about the init method in the init method documentation
2. Join(): If auto join is set to false. You can use the join method to let participants join the video call.
You can add the join method call to a button or let admin call it from the back end.
You can also pass the name of the participant when joining the Video chat. You also need accessToken when joining the user to Video Call.
You can learn more about the documentation on join method page
3. Leave(): Using this method you can exit the participant from the meeting.
note leave method must be called after the join method.
4. openChat(): You can open the chat in the iframe. Along with the Video call embed you can also have chat within the iframe
5. closeChat(): You can close the chat if its open in the iframe.
6. startCamera(): You can open any participants camera with the open camera method
7. stopCamera(): You can stop the camera using the stopCamera() method
Events
- Online Participants: The event contains an array of all participants in the meeting and it is emitted during regular intervals of time.
- Participant Joined: This event is emitted when a participant joins the meeting
- Participant Left: Participant Left is called when the participant leaves the meeting
- ParticipantSharingStateUpdate: This event is called when the participant leaves the meeting
- meetingLeft: This event is emitted when the current user leaves the meeting
Customizing the Video Call using SDK
These are just the Methods and events for the iframe. You can create a completely custom application with Precision customizations using the Native JavaScript SDK and APIs
You can learn more about JavaScript SDK and APIS here: https://www.metered.ca/docs/

Creating a 1-1 Video Call
You can easily create 1-1 Video call as well.
To create a 1-1 video call you can either create a new room and adjust the setting there or edit and existing room to make it 1-1 video call only
go to Dashboard -> Rooms -> Create Room
scroll down to Advanced Settings -> Maximum Participants
There set the max participants to 2
That's it now you have created a room where only 2 people can conduct video calls
Creating Group Video Calls
Here also to create a Group Video Call you can create a new room or edit an existing room.
Go to Dashboard -> Rooms -> Create Rooms
Scroll down to advanced settings -> Maximum Participants
This is now set to unlimited participants, so already in the Group Video Call mode.
You can change it to allow a max number of participants in the group video
For example: if you set the max number of participants to 20 people. No more than 20 people can enter the video calls.
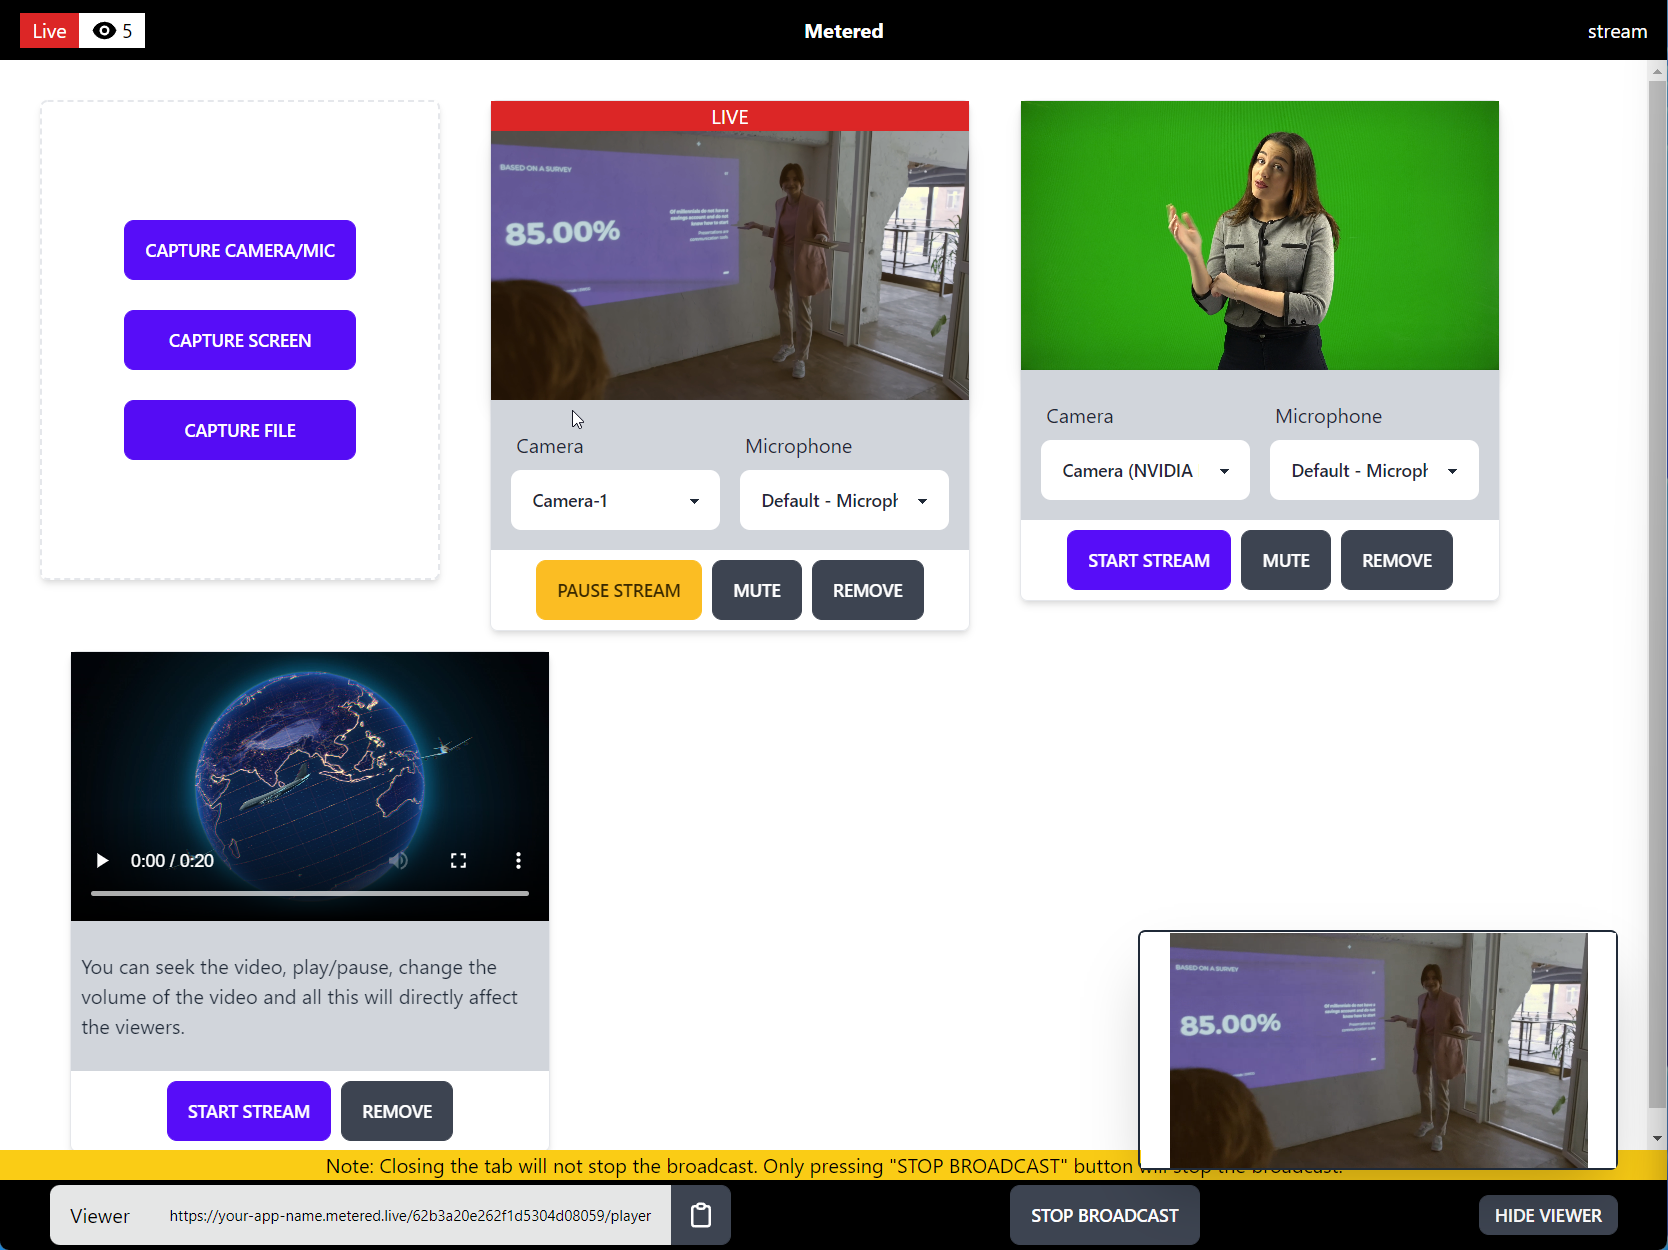
Bonus: Live Streaming the Video Call
You can Live Stream your video call using Metered Real Time Live Streaming solution.
Live Stream any video from your
- Camera
- Device
- Screen Share
- Any file on your Computer
- OBS
To thousands of users world wide with Metered Real Time Live Streaming solution.
You can try a free demo here:
We also have a free 15 day trial:
Conclusion
In this article I have explained how to add Video Call to your website in 5 easy steps.
I also explained how to customize your video call experience.
If you want to add video call to your WordPress site check out our article on How to embed video call on WordPress