In this guide we are going to learn about how to get started with Metered Global TURN servers.
Here is what you are going to learn in this guide:
- Dashboard Overview
- Selecting TURN Server region
- Creating your first credential
- Adding the Label
- Reading the Instructions
- Adding the Ice Server Array
- Testing the TURN server
- Creating your first video meeting using the TURN server
- Testing if you can reach the TURN server
- Using the API
- Purchasing a Plan
- Recharging / Top up for overages What
- Contact Support and Getting Help
Dashboard Overview
When you sign up for Metered and go to the TURN Server Dashboard. It looks something like this
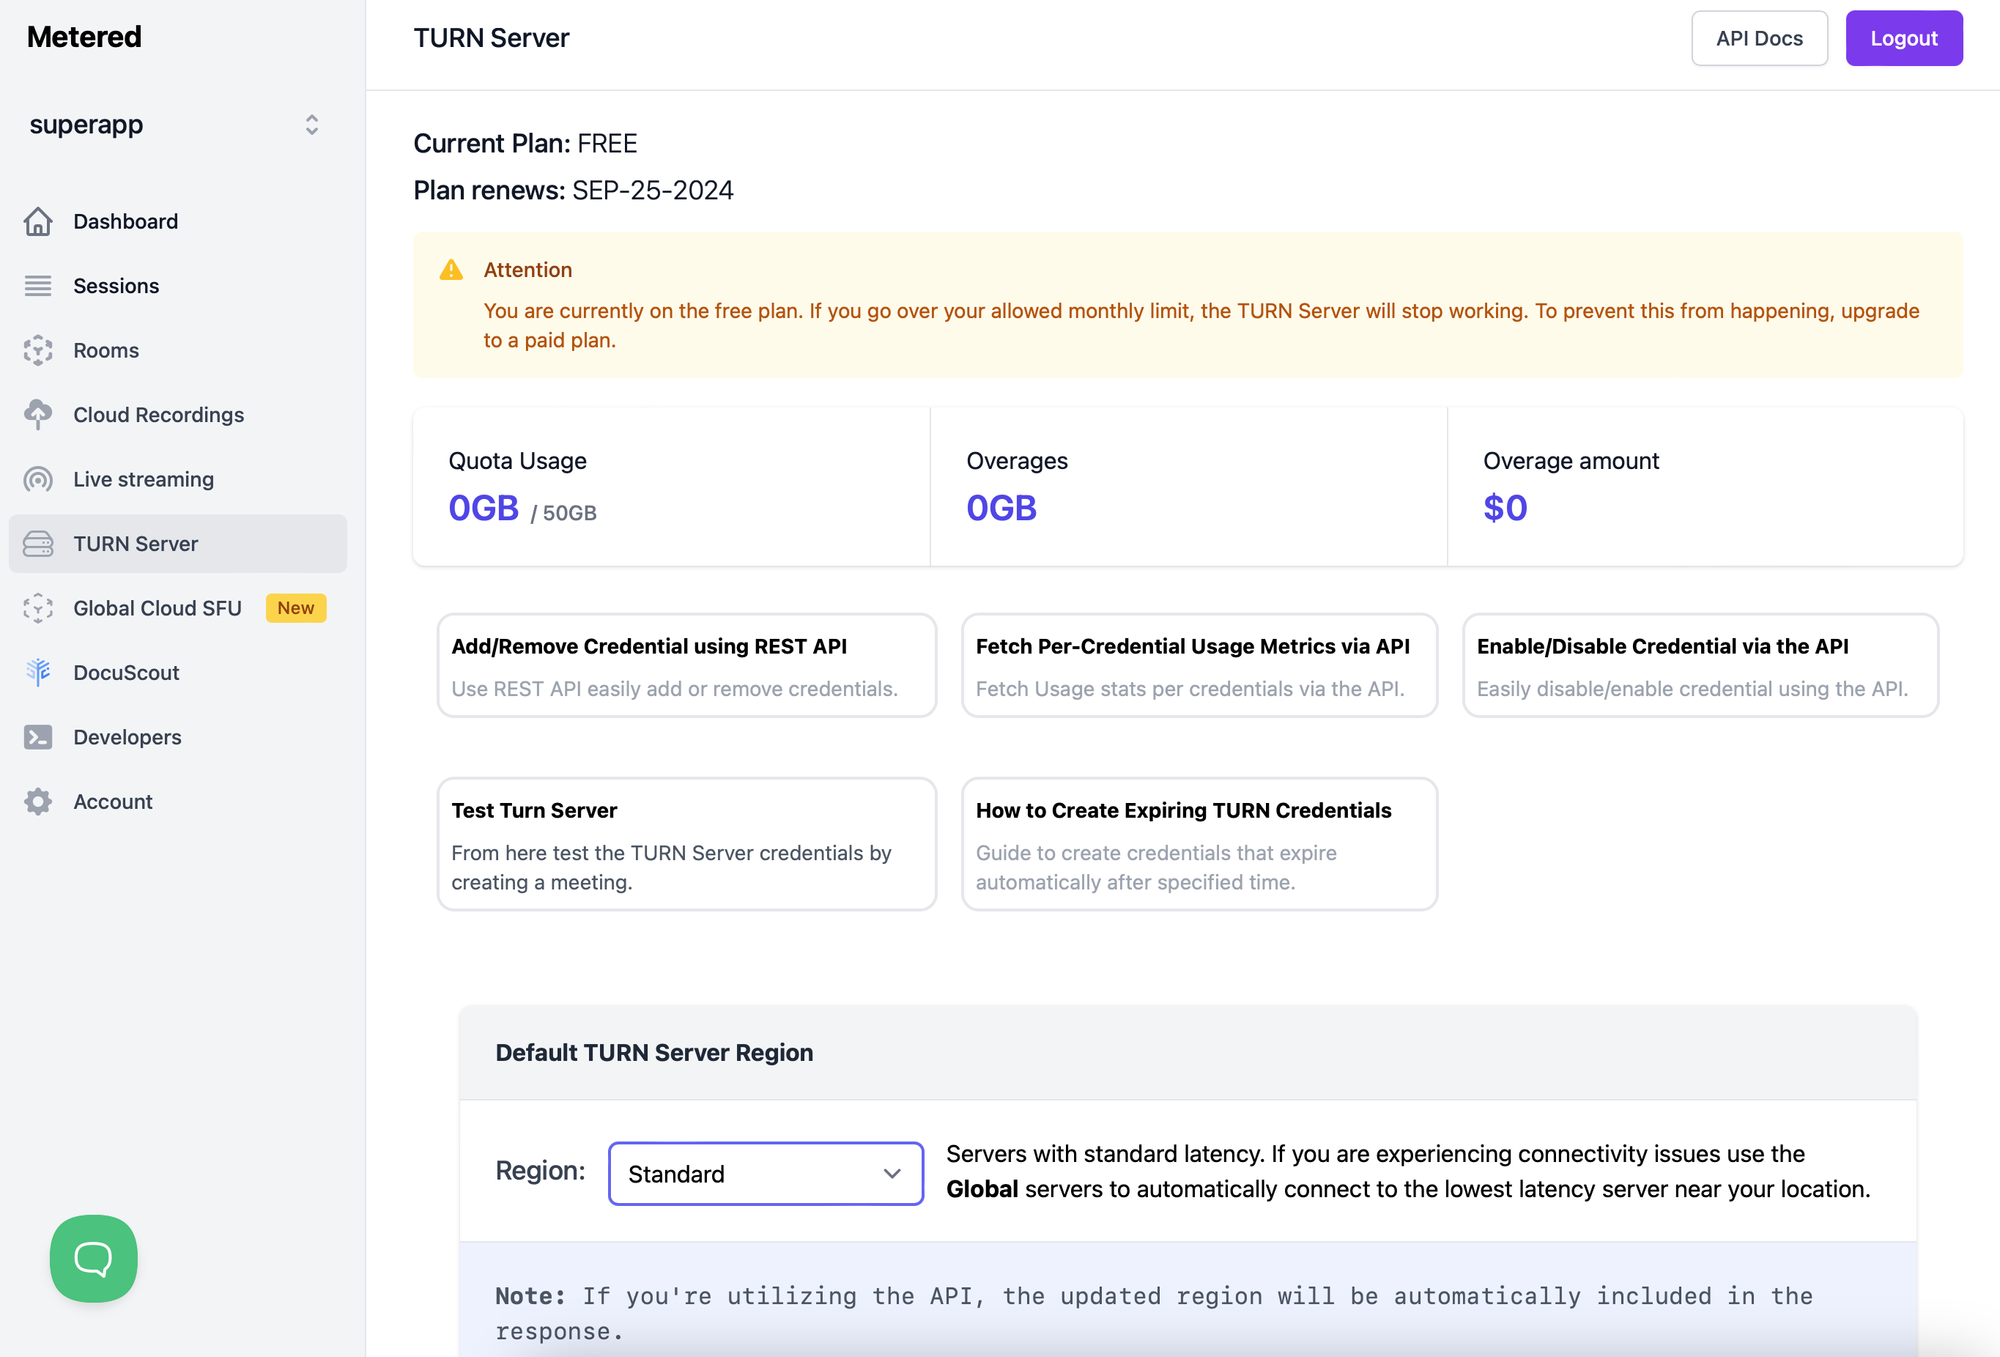
Here you can see
- What Plan you are on, When does your plan renew
- How much Qouta you have per month and how much you have used up
- What are the overages if any (Overages are the usage in GB above your quota limit)
- What is the Overage amount that is charged to you
Useful Links
Here you can find some useful links for API documentation and testing the TURN servers
Region Selection
Here you can selec any region of your choice, we suggest selecting the Global region
TURN Credentials
Here you can create and delete the TURN credentials
Plan selection
Here you can select any plan that suits your needs
Selecting TURN Server Region
In this section you can select the TURN server region of your choice.
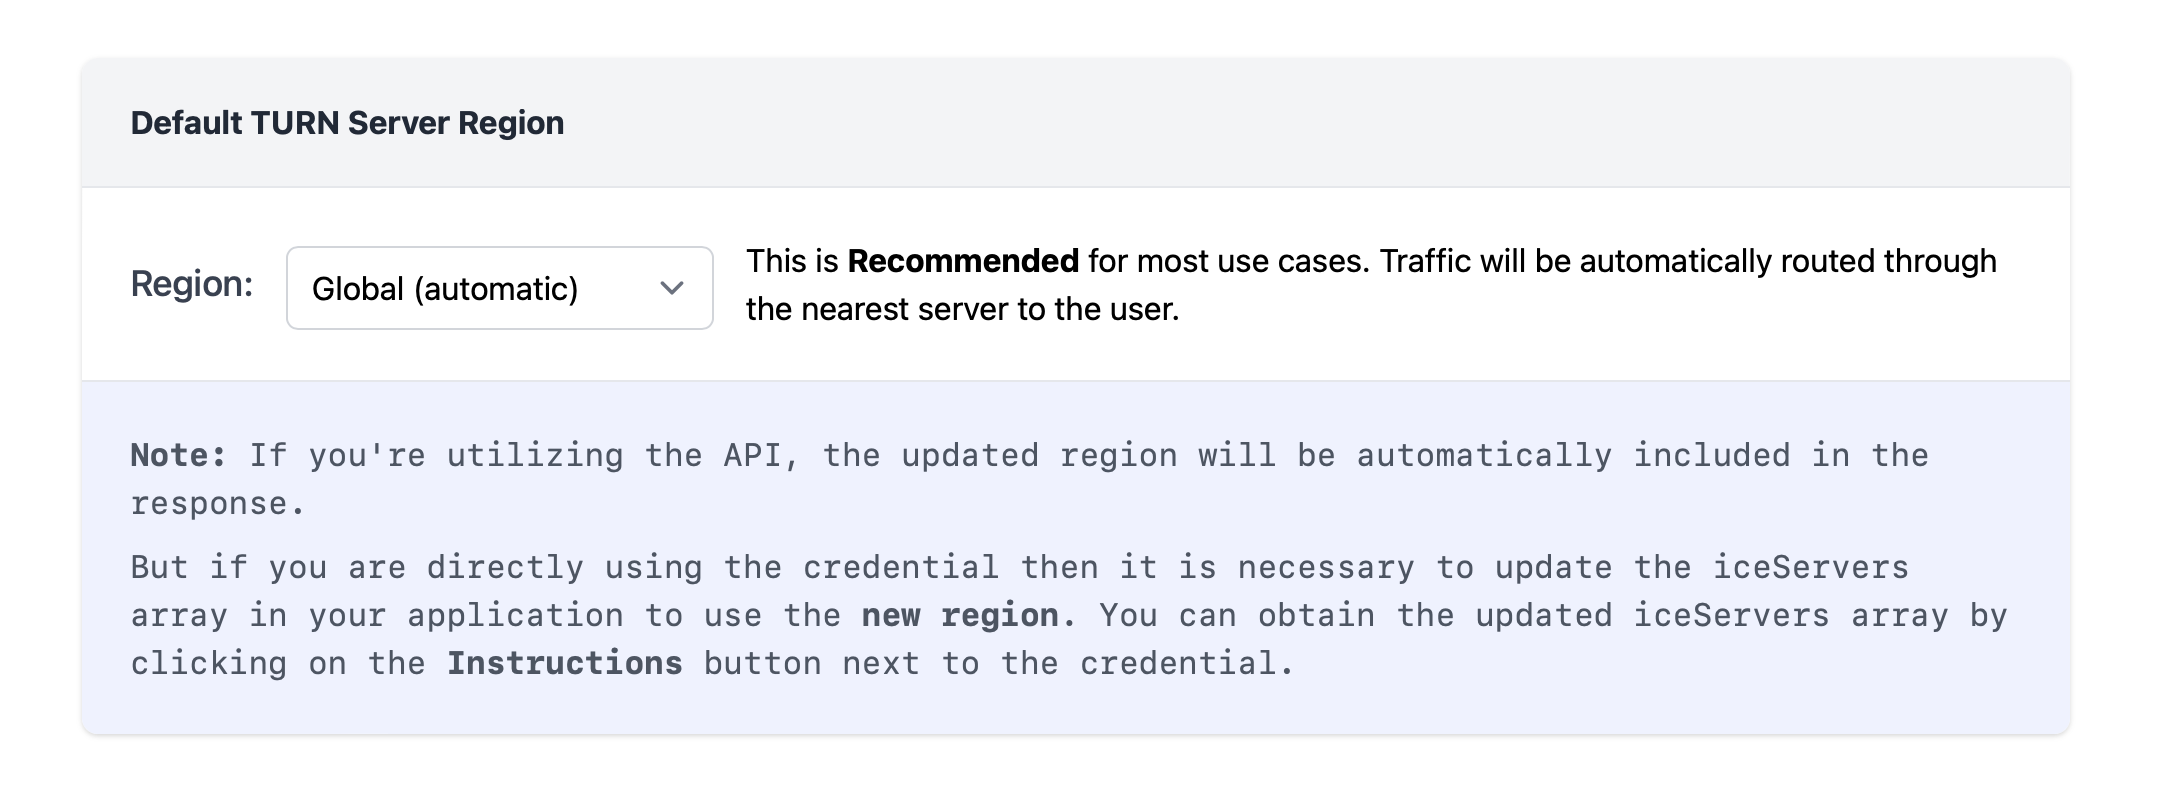
To select a region simple click on the dropdown and select the region of your choice
We suggest selecting the Global region because the traffic will be automatically routed through the server that is nearest to the user.
If you select any other server, all the traffic will be routed through that region only, although users can be anywhere around the world
Here are the regions:
Standard
Global (automatic)
North America only
E.U only
Europe only
Asia only
Oceania only
South America only
U.S West only
U.S Central only
U.S East only
Canada Central only
Canada East only
Europe West only
Europe Central only
Asia West only
Asia East only
Oceania only
Canada Only
USA Only
UK Only
Singapore Only
Seoul Only
India Only
Australia Only
Brazil Only
for a complete list of regions visit the webpage: https://www.metered.ca/docs/turnserver-guides/turnserver-regions/
you can also select the regions using the API. Here is the documentation: https://www.metered.ca/docs/turn-rest-api/get-credential
Creating your first credential
You can create your first credential by clicking on the Generate your first credential button
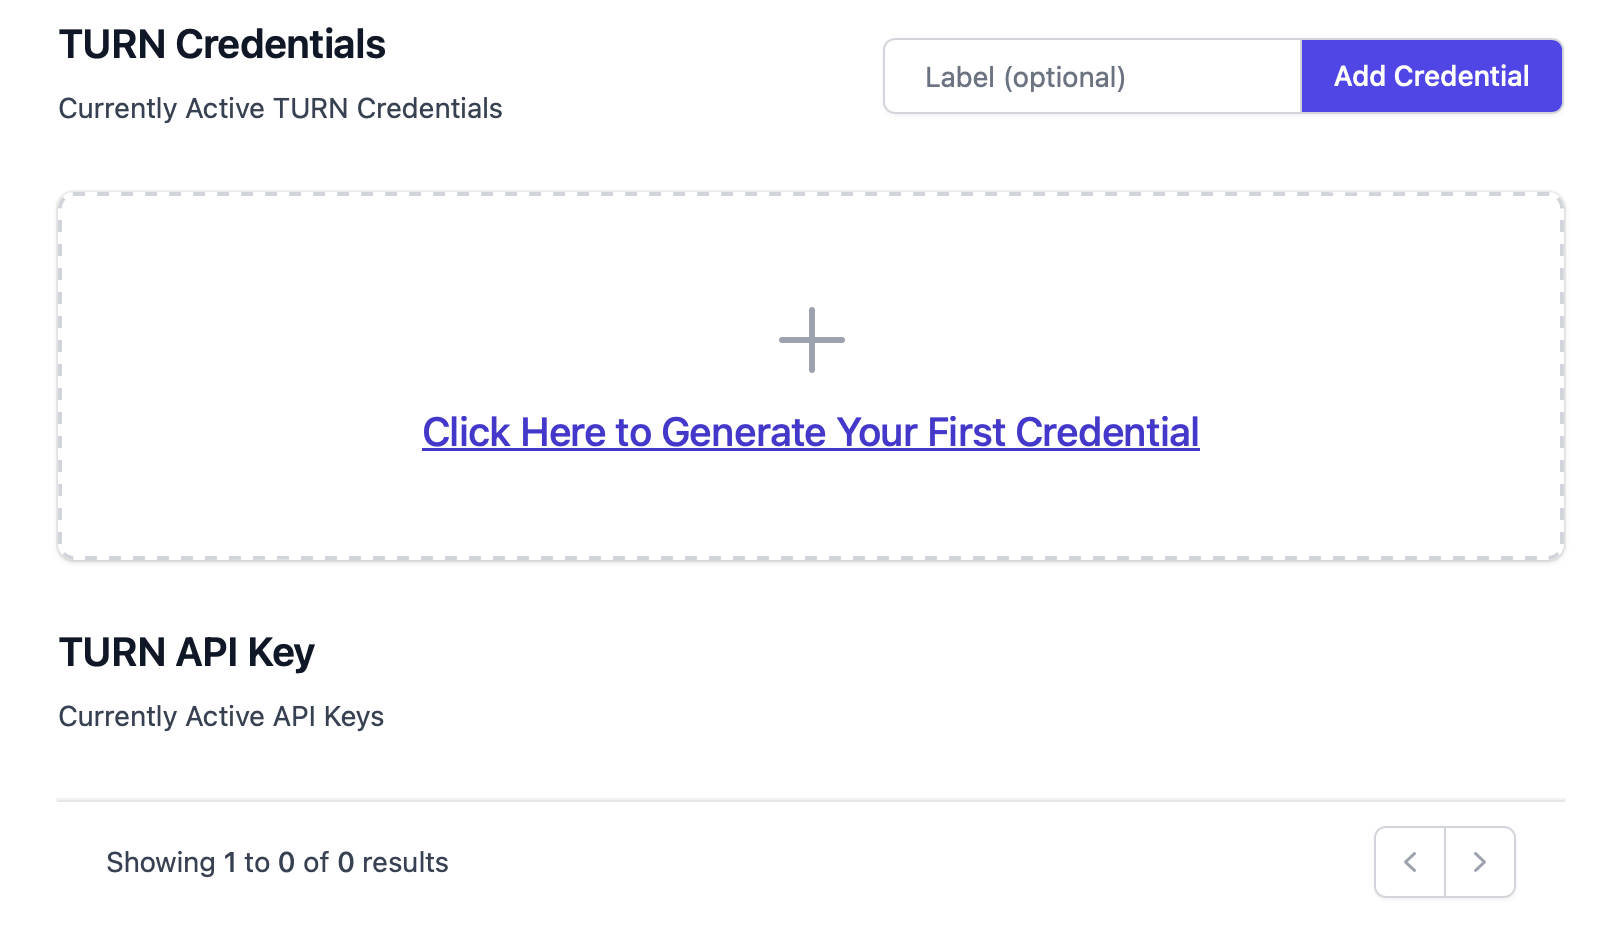
you can also assign a label to your credential and then click on the Add Credential button to add a new credential with a new label
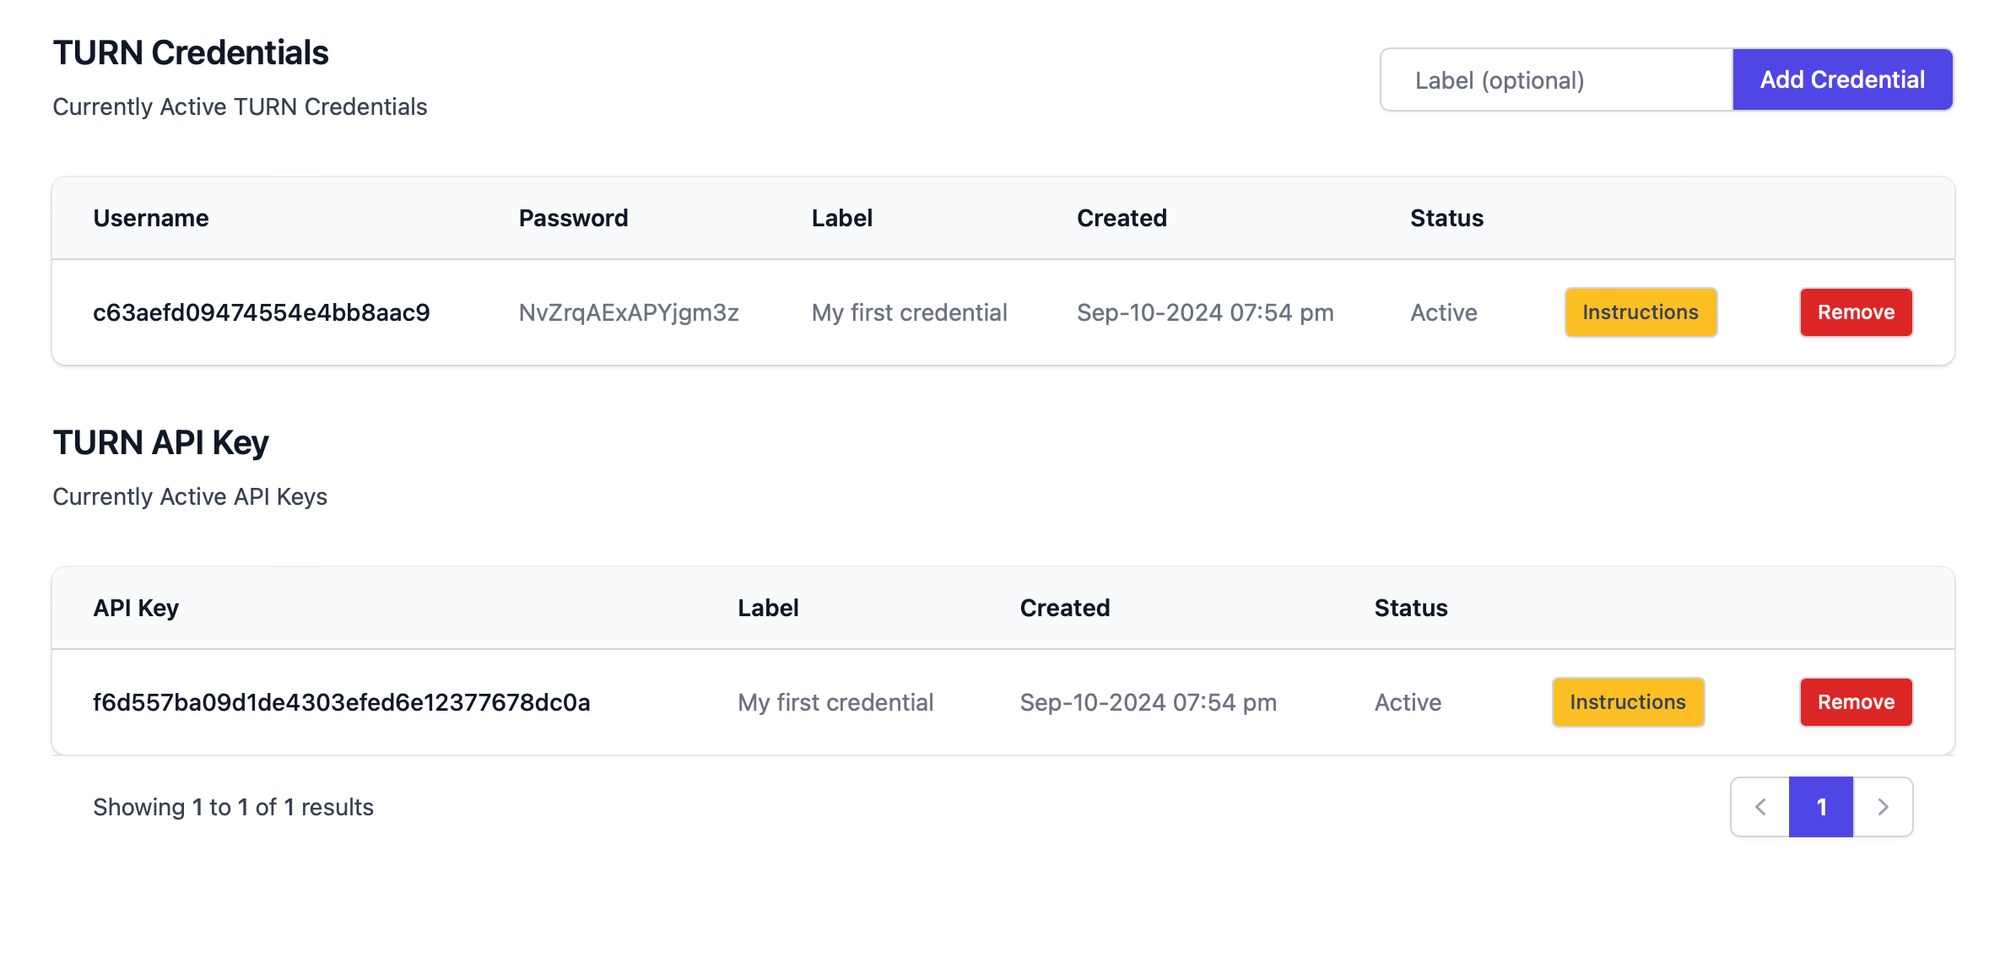
Reading the Instructions and Adding ICE server array
In the instructions section you can see the ICE server array. You can add this ICE server array in your applicaton
This array automatically updates when you select any regions from the drop down, you need to click on the instructions button again when you are selecting a different region .
This ICE server array will get automatically updated and you need to come here and copy the updated ICE server array for that perticular credential
var myPeerConnection = new RTCPeerConnection({
  iceServers: [
      {
        urls: "stun:stun.relay.metered.ca:80",
      },
      {
        urls: "turn:global.relay.metered.ca:80",
        username: "hfjdskhfuiewrhgurehtuire",
        credential: "dgjhdfjghdfkjhg",
      },
      {
        urls: "turn:global.relay.metered.ca:80?transport=tcp",
        username: "hfjdskhfuiewrhgurehtuire",
        credential: "dgjhdfjghdfkjhg",
      },
      {
        urls: "turn:global.relay.metered.ca:443",
        username: "hfjdskhfuiewrhgurehtuire",
        credential: "dgjhdfjghdfkjhg",
      },
      {
        urls: "turns:global.relay.metered.ca:443?transport=tcp",
        username: "hfjdskhfuiewrhgurehtuire",
        credential: "dgjhdfjghdfkjhg",
      },
  ],
});
ICE server array
Testing the TURN server
There are two ways to testing the TURN server using your credentials.
1. Creating your first video meeting using the TURN server
You can create a new video meeting then copy the URL and open it on two different browsers or two different computers.
you can open the url on your own computers in two different browsers or share the url with your friend that is on the other side of the world
You can create the meeting by going on this website:
Step 1: Copy your TURN API KEY from the dashboard
On your TURN Server dashboard create a credential, then copy that credential
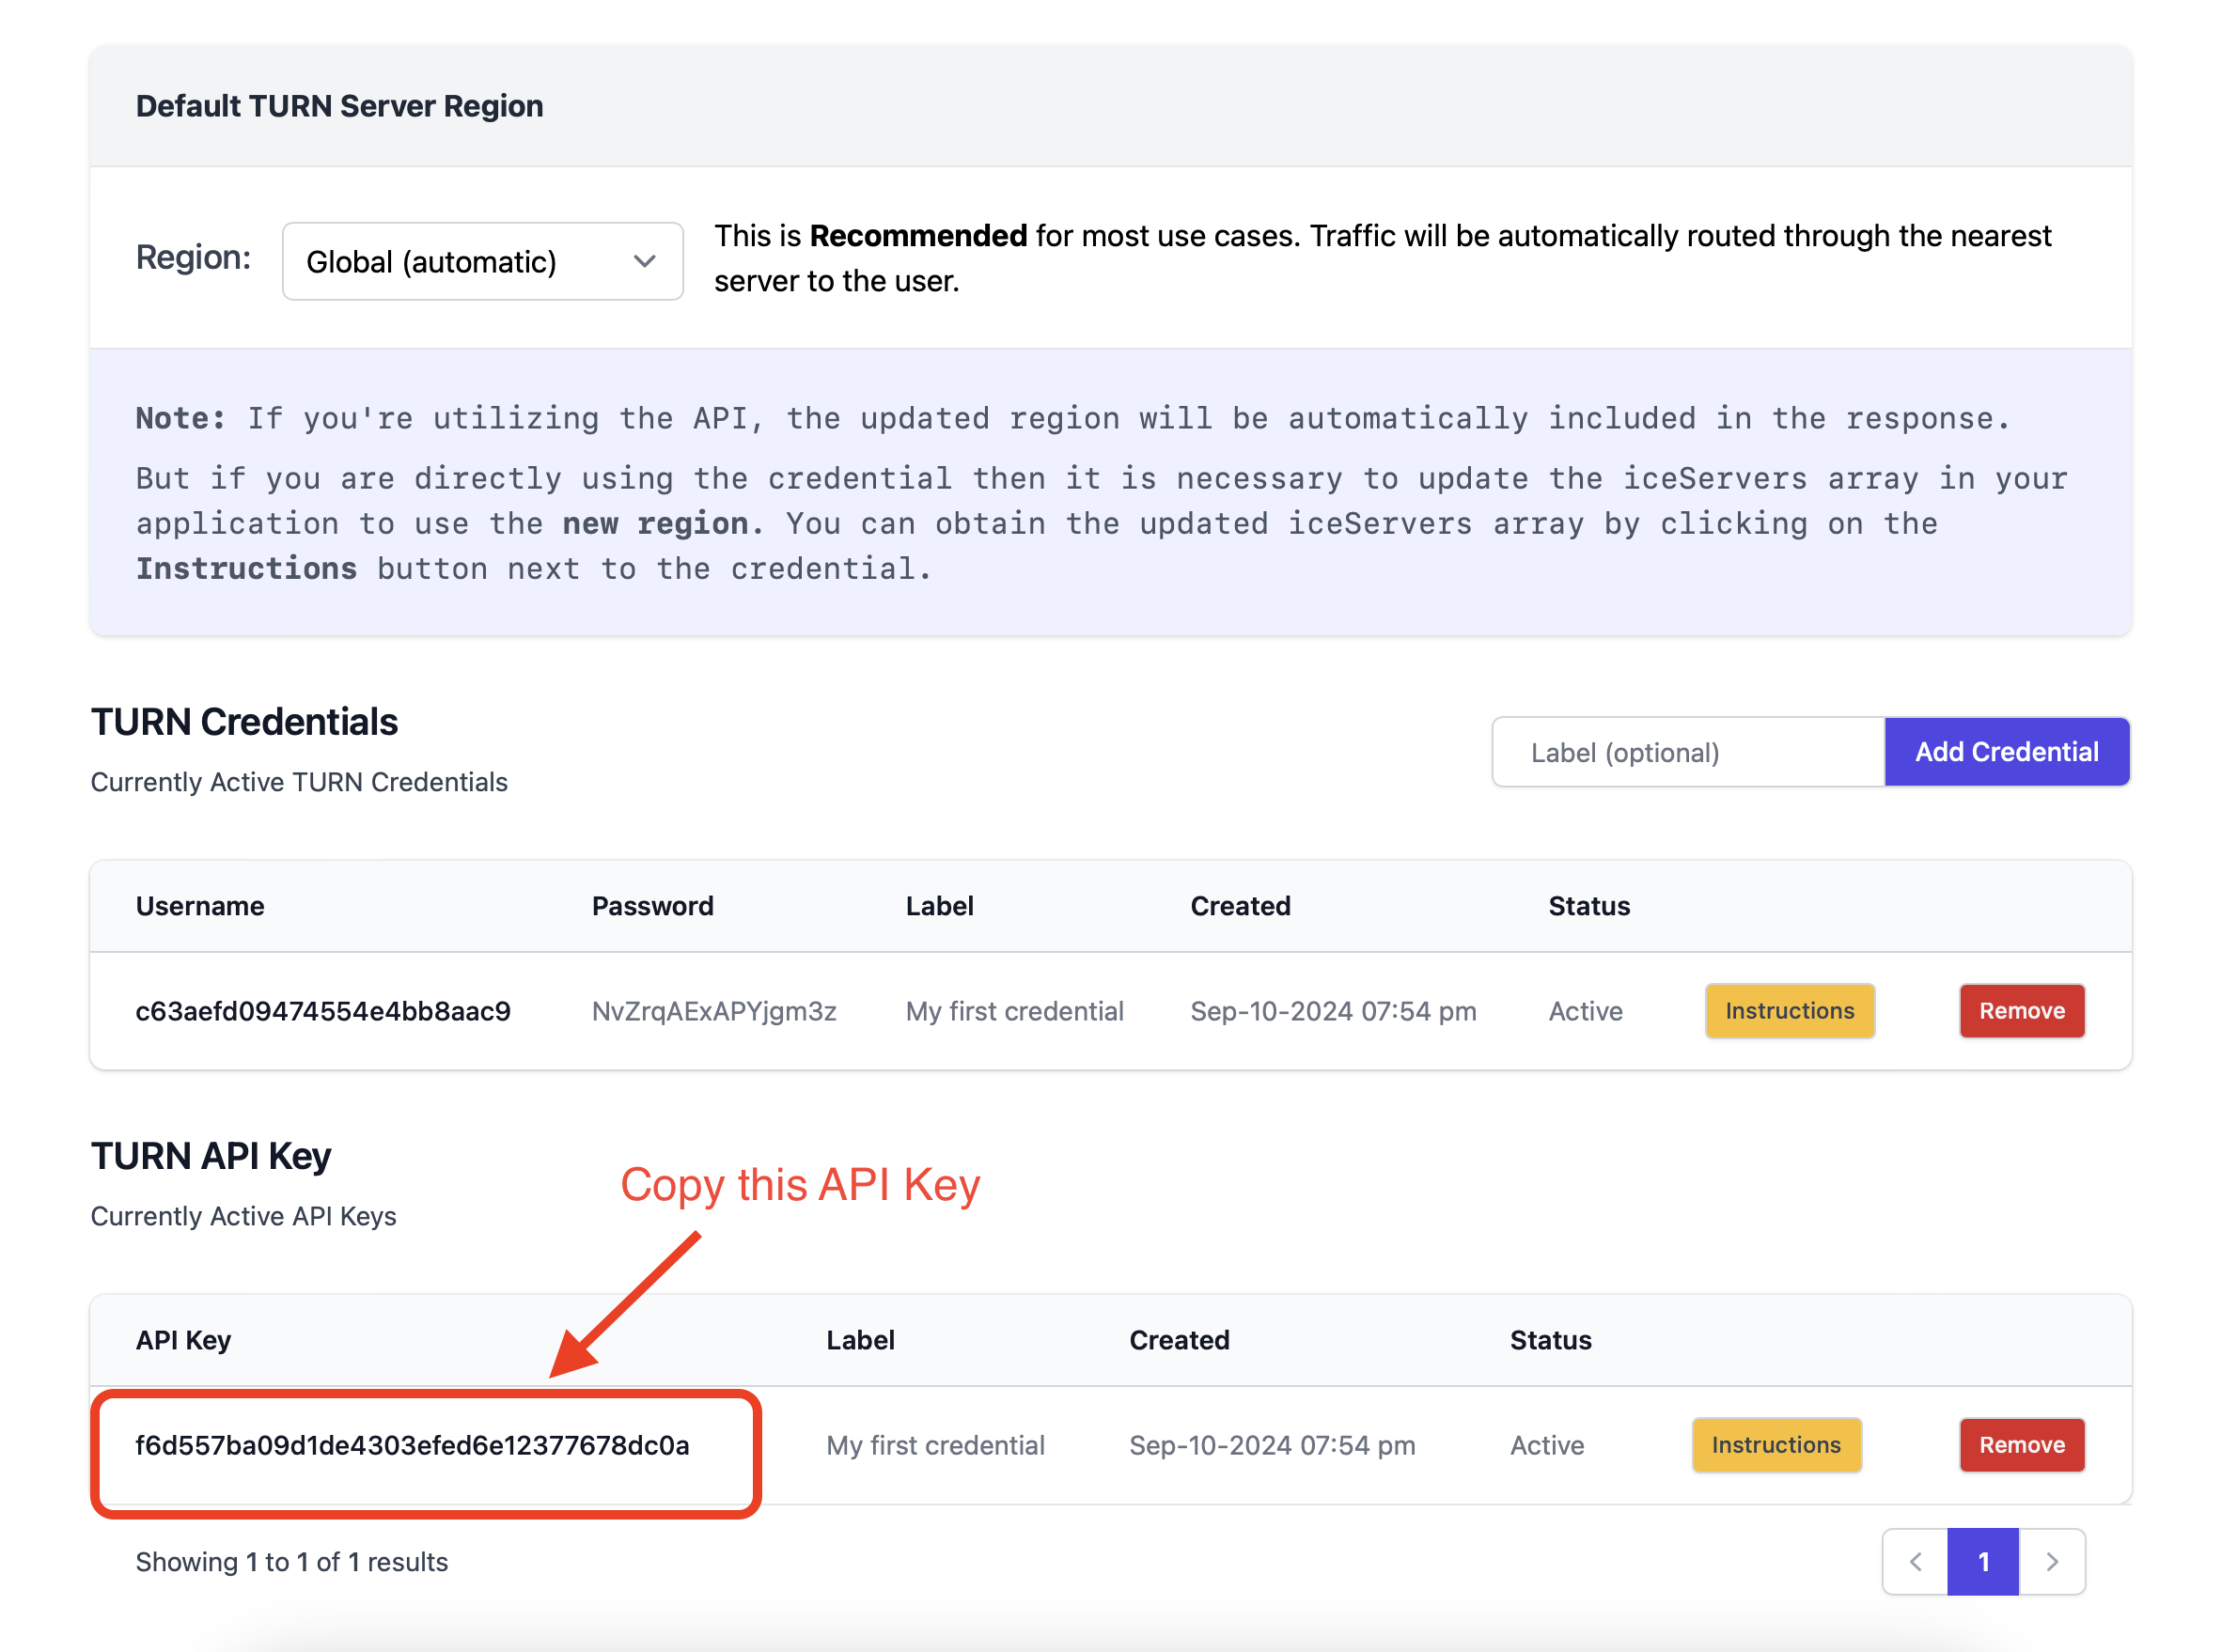
Step 2: Paste the API
Go to : https://turndemo.metered.ca/
Paste the API Key and click on the Create Meeting button to create a new meeting
Step 3: Share the URL
Share the video meeting URL with other participants or open the url in another browser and enter the meeting
This meeting will go through metered turn servers
2. Testing if you can reach the TURN server
you can also test if are able to reach the turn server
Step 1: go to the website
go to the website: https://www.metered.ca/turn-server-testing
Step 2: Copy the ICE server array
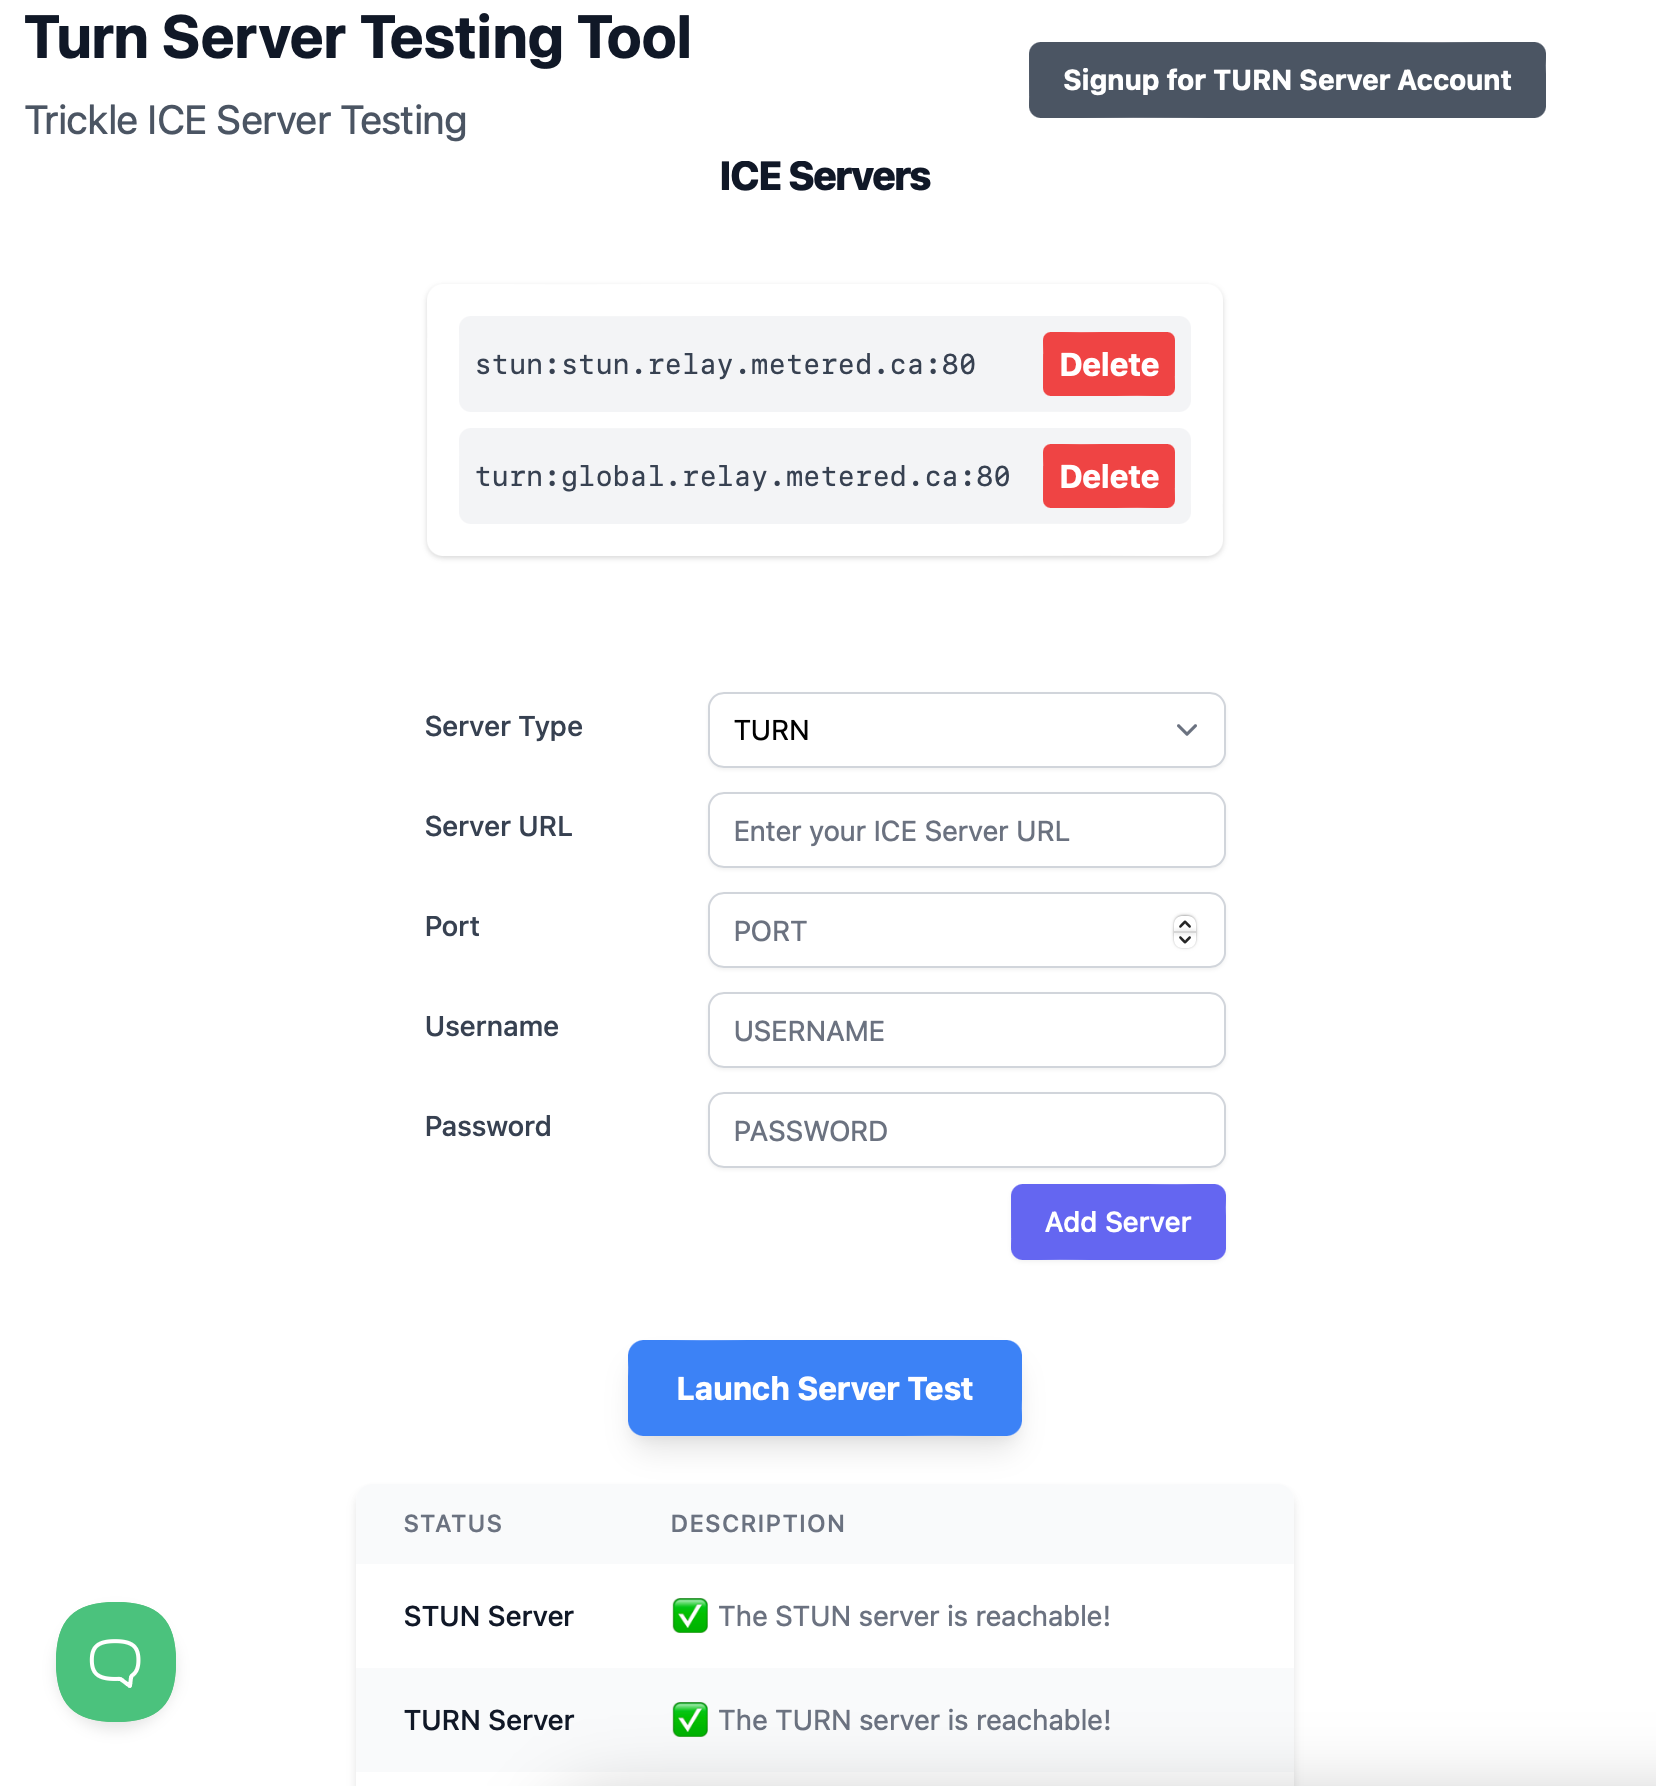
Create your credential and then copy the ICE server array by clicking on the Instructions button.
From there copy the TURN server URL and the port number
Step 3: Add the credentials in the website
You can add multiple TURN and STUN servers on the TURN server test website
then click on the Add Server button after adding each server and at last click on the launch server test button to launch the turn server test
Using the API
You can also use the API for all things that you can do on the dashboard
Here is the API documentation: https://www.metered.ca/docs/turn-rest-api/get-credential
Purchasing a Plan
You can scroll down to see the plans on the dashboard itself
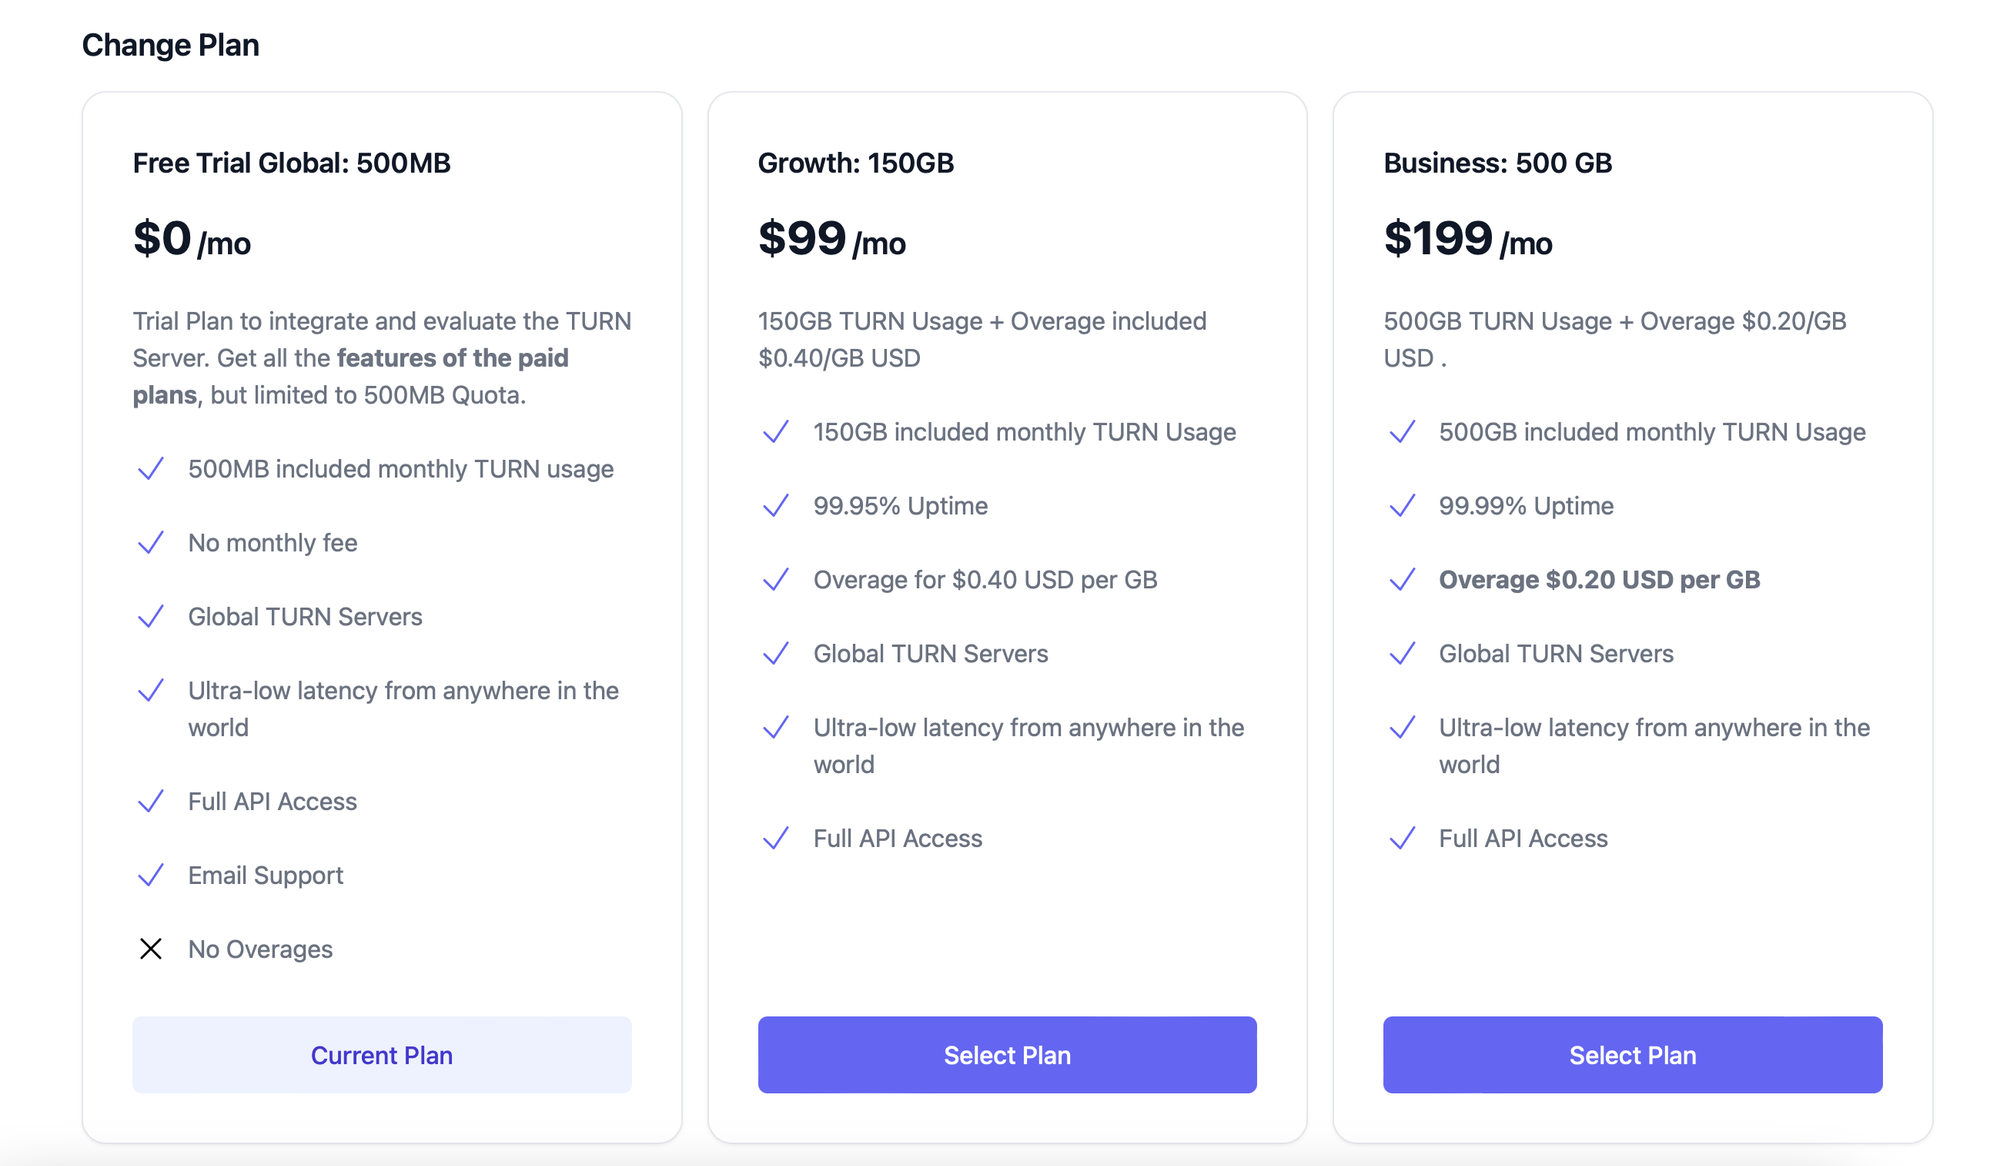
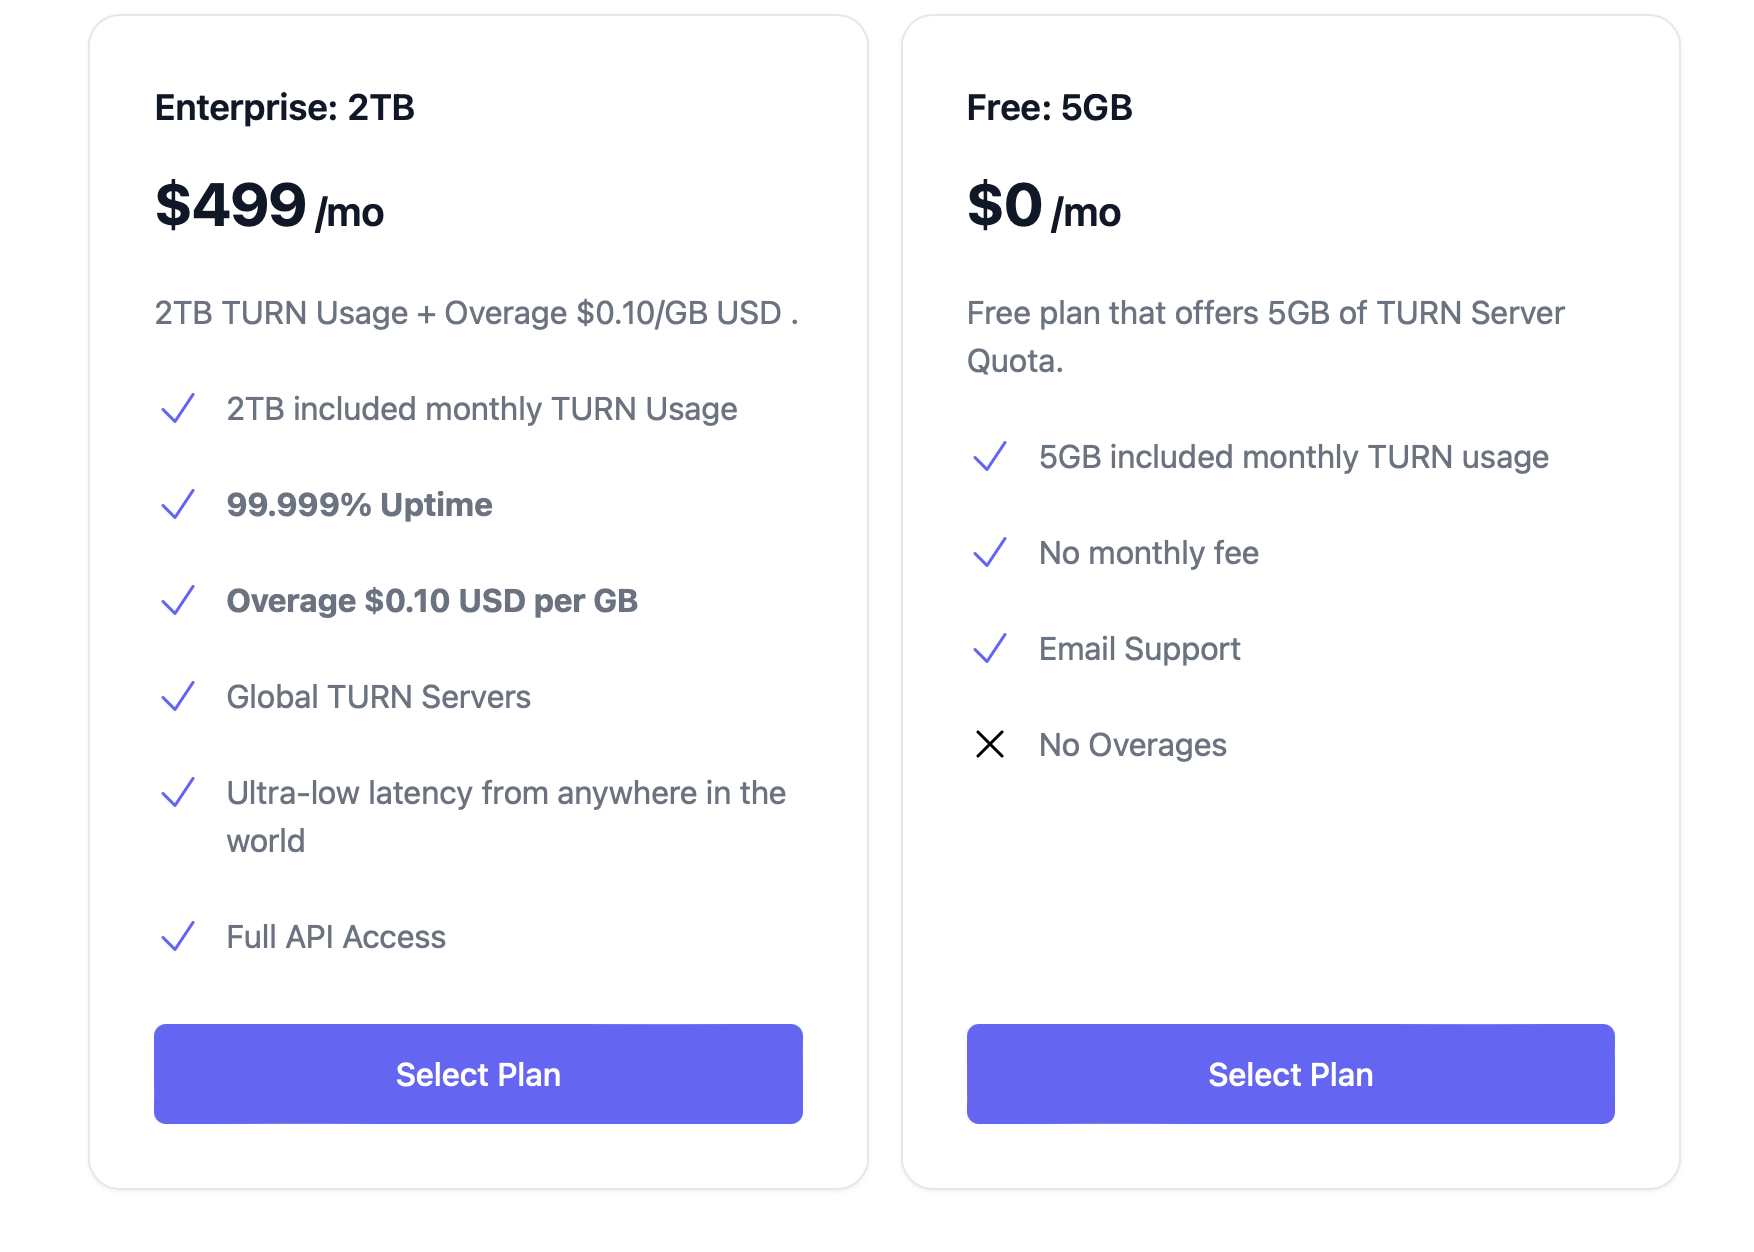
You can choose a plan according to your needs.
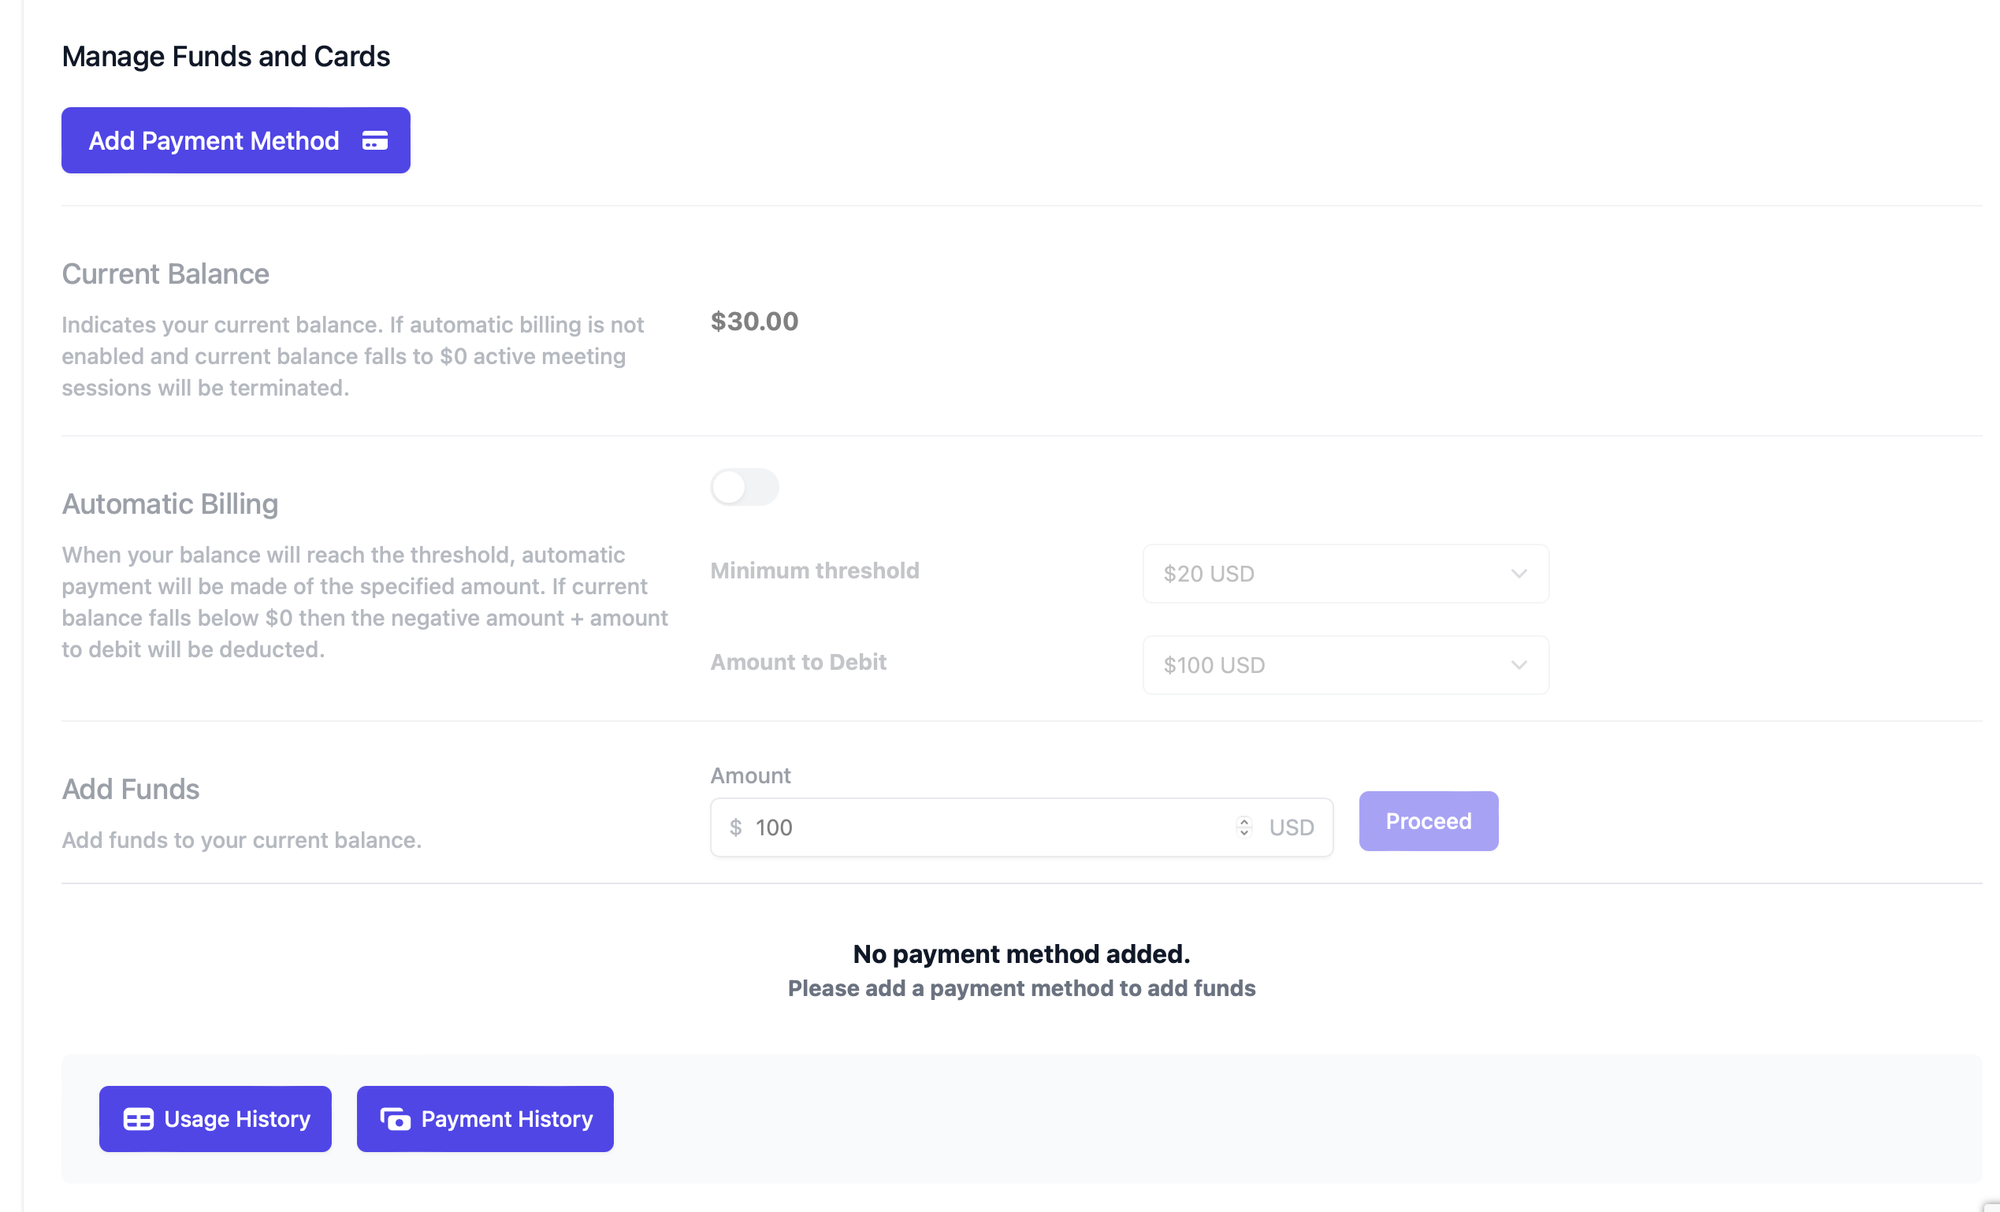
Recharging / top-Up for overages
With each plan you get some amount of data that comes bundled with the plan. Once you use up all that data you will be charged the overage amount that is associated with the plan that you are subscribed to
TO add the amount that can be used for overages go to
Dashboard -> Account
and you can add funds there
you can also enable automatic billing where dollar amount will be automatically be deducted from your account when you are low on balence
Contact Support and Getting Help
If you have any questions or need additional support regarding the TURN Server Service, please feel free to send us an email: Support[at]metered.ca Our sales and support team will be happy to assist you with both technical and sales-related queries.

- API: TURN server management with powerful API. You can do things like Add/ Remove credentials via the API, Retrieve Per User / Credentials and User metrics via the API, Enable/ Disable credentials via the API, Retrive Usage data by date via the API.
- Global Geo-Location targeting: Automatically directs traffic to the nearest servers, for lowest possible latency and highest quality performance. less than 50 ms latency anywhere around the world
- Servers in all the Regions of the world: Toronto, Miami, San Francisco, Amsterdam, London, Frankfurt, Bangalore, Singapore,Sydney, Seoul, Dallas, New York
- Low Latency: less than 50 ms latency, anywhere across the world.
- Cost-Effective: pay-as-you-go pricing with bandwidth and volume discounts available.
- Easy Administration: Get usage logs, emails when accounts reach threshold limits, billing records and email and phone support.
- Standards Compliant: Conforms to RFCs 5389, 5769, 5780, 5766, 6062, 6156, 5245, 5768, 6336, 6544, 5928 over UDP, TCP, TLS, and DTLS.
- Multi‑Tenancy: Create multiple credentials and separate the usage by customer, or different apps. Get Usage logs, billing records and threshold alerts.
- Enterprise Reliability: 99.999% Uptime with SLA.
- Enterprise Scale: With no limit on concurrent traffic or total traffic. Metered TURN Servers provide Enterprise Scalability
- 5 GB/mo Free: Get 5 GB every month free TURN server usage with the Free Plan
- Runs on port 80 and 443
- Support TURNS + SSL to allow connections through deep packet inspection firewalls.
- Supports both TCP and UDP
- Free Unlimited STUN
Consider some of our other articles: